The Festival Nail Fiasco That Started It All
Okay, so I have to confess something. My first attempt at festival nails was… a disaster. Picture this: me, my three kids still in tow, trying to squeeze in a quick mani before heading to my first music festival in years. I thought, “Rainbow chrome nails? Pfft, how hard can it be?”
Spoiler alert: hard. I ended up with uneven streaks, chrome powder EVERYWHERE (including my coffee), and one nail that somehow looked like it belonged on a toddler’s art project. Honestly, I considered just going nude and pretending nothing happened.
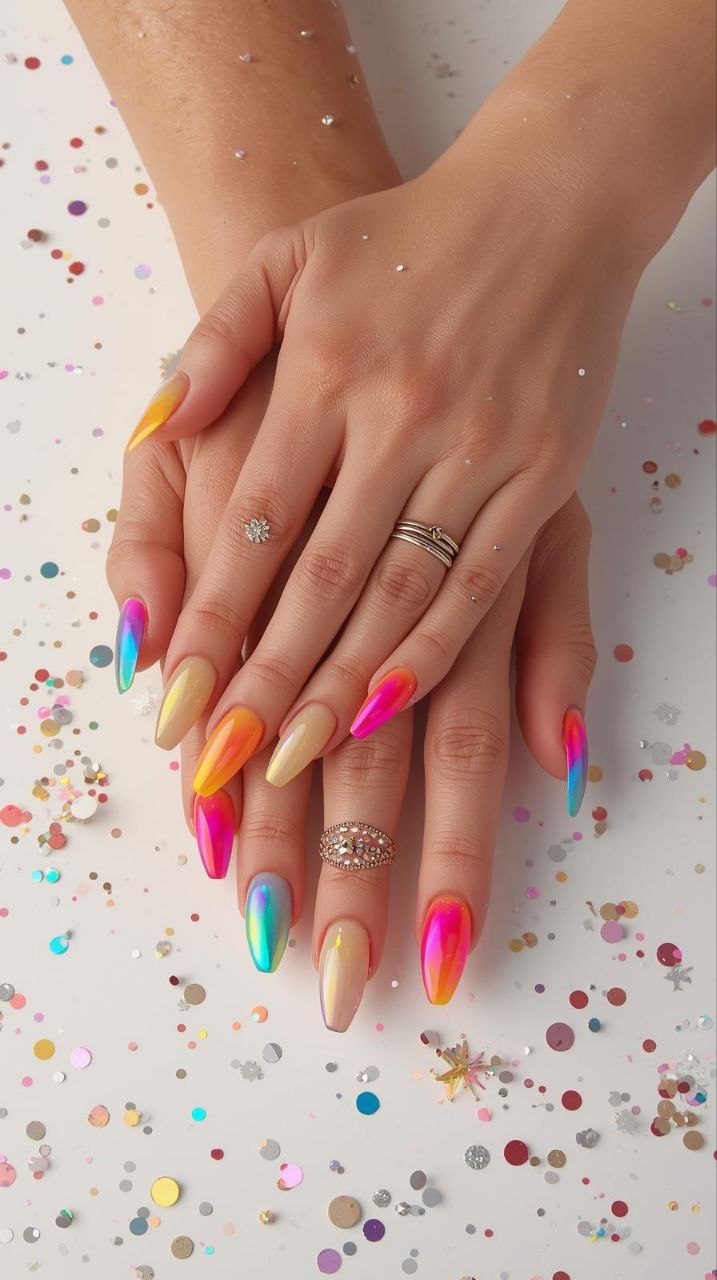
But here’s the thing—I didn’t give up. I obsessed over techniques, watched literally every tutorial (while chasing the kids around), and slowly figured out how to actually make Festival Rainbow Chrome Nails work. And let me tell you, once I got it right… magic. People complimented my nails more than my outfit. At one point, a stranger asked to film my hands. Yes, my nails had a moment all their own.
So, here we are. I want to save you from the chaos, the glitter explosions, and the “why do my nails look like mud?” moments. If you’ve ever wanted rainbow chrome nails that actually look professional and last through a festival weekend, you’re in the right place.
Why Rainbow Chrome Nails Are a Festival Mom’s Secret Weapon 💅
Honestly, festivals are exhausting. Between corralling kids, dodging spilled drinks, and trying to find your friends, the last thing you want to worry about is chipped nails. That’s why rainbow chrome nails are perfect. They:
- Catch every light – sunlight, stage lights, LED wristbands… it doesn’t matter.
- Work with every outfit – I paired mine with everything from glittery romper to casual denim shorts.
- Boost confidence instantly – because yes, shiny nails do make you feel like a million bucks.
- Make for easy photo moments – no filter needed, trust me.
I remember one particular day at a daytime festival. I had thrown on a basic tank and jean shorts, feeling… meh. And then I waved my hand while cheering for my favorite band—and people actually looked at my nails first. My husband gave me that “I told you so” smile. Lesson learned: nails are non-negotiable.
Parting Thought Before We Dive In
Before we jump into step-by-step tips, DIY hacks, and design ideas, I want you to know: you don’t have to be a nail artist to pull this off. I’m not one. My attempts at acrylics are laughable. But with a little guidance, some patience, and yes… maybe a spill or two of chrome powder, you can rock rainbow chrome nails that last and look amazing.
Next up, we’ll dive into the tools and products that actually make this possible, and I’ll share the little hacks I discovered that changed everything for me.
Tools, Products, and Choosing Between DIY or Salon
Essential Tools & Products for Festival Rainbow Chrome Nails
Okay, so the first time I tried rainbow chrome nails at home, I thought all I needed was a glittery polish and a steady hand. Big mistake. I ended up looking like I’d dipped my fingers in a bag of skittles and then rubbed them on my carpet. Not cute.
Here’s what actually works:
- Gel Base Coat – This is your foundation, like the primer for your nails. Skip it, and your chrome powder will look patchy.
- Gel Nail Polish – I personally love starting with a neutral or dark base. Dark polish makes the rainbow really pop, while light polish gives it a soft dreamy look.
- Rainbow Chrome Powder – Tiny miracle dust that transforms your nails from “meh” to magical. Trust me, quality matters. Cheaper powders are more streaky and dull.
- No-Wipe Gel Top Coat – Locks in the chrome and gives that mirror finish. Don’t skip this, momma.
- UV/LED Lamp – I tried sunlight curing once… let’s just say I cried. Save yourself.
- Applicators – Silicone tools or soft eyeshadow brushes work best for rubbing the powder in. I’ve tried q-tips before… never again.
Optional, but fun:
- Rhinestones, small stickers, or glitter for that festival “extra” touch 🌟
DIY vs. Salon: Which One Should You Choose?
Here’s the honest truth: both routes are totally valid, but each has its quirks. Let me tell you what I’ve learned from painful trial and error.
DIY Rainbow Chrome Nails
Pros:
- Cheaper in the long run (once you buy the supplies)
- Total control over colors, designs, and experimenting
- Can do a midnight “I feel like a unicorn” vibe without judgment
Cons:
- Messy. Chrome powder gets everywhere. I once found it in my hair hours later.
- Takes time to perfect. Your first few tries might look like toddler art.
- You have to buy all the tools upfront, which can be intimidating.
Personal story: The first time I did DIY chrome, my toddler decided to “help” by grabbing the brush mid-application. I ended up with chrome handprints on the couch, my dog, and basically everything in a five-foot radius. But hey, I learned to keep them occupied first.
Salon Rainbow Chrome Nails
Pros:
- Professional, smooth finish
- Lasts longer (3–4 weeks for real)
- No clean-up disasters
- Great for a festival weekend when you’re juggling kids, snacks, and sunscreen
Cons:
- Pricier than DIY
- Less personal experimentation (sometimes stylists stick to standard colors)
- You have to schedule ahead, especially during festival season
My tip: If you’re a first-timer, hit the salon once to see the technique in action. Then, when you try DIY, you’ll know the little tricks that make it flawless.
Mini Story: My First Salon Experience
I was skeptical. “It’s just nails, right?” Wrong. I walked in thinking I’d be chill. Two hours later, I walked out feeling like a rainbow queen. They even taught me how to rub in the powder for a gradient effect that I could try at home. Lesson learned: professionals know their magic.
Pro Tips Before You Start
- Prep is EVERYTHING – Push back cuticles, buff the nails, clean off oils. Chrome won’t stick to a greasy surface.
- Thin layers – Don’t glob the gel polish. Thin layers = smoother mirror effect.
- Seal the edges – Top coat should cover tips to prevent chipping, especially when festival-proofing.
- Be patient – Rushing leads to streaks, smudges, and heartbreak. Trust me, I’ve cried over a messed-up nail before.
Parting Thoughts
Whether you DIY or hit the salon, having the right tools, base polish, and a steady hand (or professional help) is the difference between “meh” nails and festival-ready, rainbow-reflecting masterpieces.
Step-by-Step Guide to Perfect DIY Festival Rainbow Chrome Nails 💅✨
Okay, so by this point, you’ve got your tools, powders, and maybe a little patience (or not, because… toddlers, am I right?). Now it’s time to actually make those nails shine like a rainbow under festival lights.
Step 1: Prep Like a Pro
Prep is honestly 80% of the battle. Skipping it? Disaster. I learned this the hard way.
Here’s my ritual:
- Remove old polish – I use a gentle acetone-free remover. My nails are dramatic enough; no need to weaken them.
- Push back cuticles – I like using a cuticle stick while watching my kids’ cartoons. Multitasking at its finest.
- Buff the surface – Lightly, so the powder sticks without scratching.
Mini Story: One time, I skipped buffing because “I was in a hurry.” Let’s just say the powder went on patchy and streaky. Lesson learned—never underestimate a smooth canvas.
Step 2: Base Coat & Gel Polish
- Apply a thin layer of gel base coat
- Cure under UV/LED lamp (yes, every layer matters)
- Apply gel polish in your chosen base color (black, navy, or nude are my favorites)
- Cure again
Tip: Thin layers prevent the chrome from looking streaky. I’ve learned that globbing it on = instant “mud hands” vibes.
Step 3: Chrome Powder Magic
Here’s the part that feels like actual magic.
- Use a soft silicone applicator to gently rub the rainbow chrome powder onto the nail.
- Work in circular motions—don’t swipe aggressively.
- Admire the transformation. Seriously. I always pause here, sip my coffee, and stare at my nails like a proud parent.
Pro Tip: If you want an ombre rainbow effect, start with lighter colors at the cuticle and gradually blend into darker shades at the tip. My first attempt looked like a melted Popsicle, but practice makes perfect.
Mini Story: I once let my toddler “help” by holding the powder brush. Ended up with chrome streaks across my couch and dog. Chaos, but also hilarious.
Step 4: Seal It with Top Coat
- Apply a no-wipe gel top coat
- Cure under lamp
- Seal the tips to prevent festival wear and tear
Mom Tip: Don’t skip this step. One spilled soda, and your rainbow dreams could be over.
Step 5: Optional Extras
- Rhinestones or small stickers for extra sparkle
- Mini glitter accents for festival vibes
- Tiny stripes or dots for a custom touch
Personal Insight: I like adding just one rhinestone on my ring finger. It’s subtle, but people notice. One festival-goer even asked if I had a nail fairy. True story.
Step 6: Longevity Tips for Festival Weekends
- Pack a mini top coat for quick touch-ups
- Wear gloves while cooking, packing, or moving tents
- Avoid using nails as tools (yes, that includes opening soda cans)
- Remove properly with soak-off gel to prevent damage
Mini Story: My first festival weekend, I ignored these tips and chipped a nail on the first day. I cried. Seriously, tiny tears over a tiny nail. Learn from me.
Parting Thoughts
DIY rainbow chrome nails are totally doable, even if you’re juggling kids, coffee, and festival chaos. With prep, patience, and a few hacks, your nails can shine brighter than any stage light.
Festival Rainbow Chrome Nail Designs & Styling Tips 🌈✨
Alright, mommas, if you’ve made it this far, your nails are prepped, polished, and sparkling. Now let’s talk designs that actually turn heads at festivals, plus some styling hacks I swear by.
Top Festival Rainbow Chrome Nail Designs for 2025 💅
I’ve experimented with SO many styles over the years (some successful, some… let’s just say “learning experiences”). Here’s what actually works:
1. Classic Full Rainbow Chrome
- Each nail reflects the full rainbow spectrum
- Maximum drama and compliments guaranteed
- Works on short and long nails
- My tip: Keep the polish base dark for the rainbow to really pop
Mini Story: At one festival, I was wearing a simple tank and shorts, but my nails were so vivid, people literally asked me if I’d brought my own disco lights.
2. Ombre Rainbow Chrome
- Gradient effect from cuticle to tip
- Subtle yet mesmerizing
- Best on almond or coffin-shaped nails
- My hack: Blend powders using a soft circular motion, then lightly buff for smooth transitions
Mini Story: The first time I did this, I ended up with a “melting rainbow” on one nail. My kids laughed so hard I had to take a pic anyway.
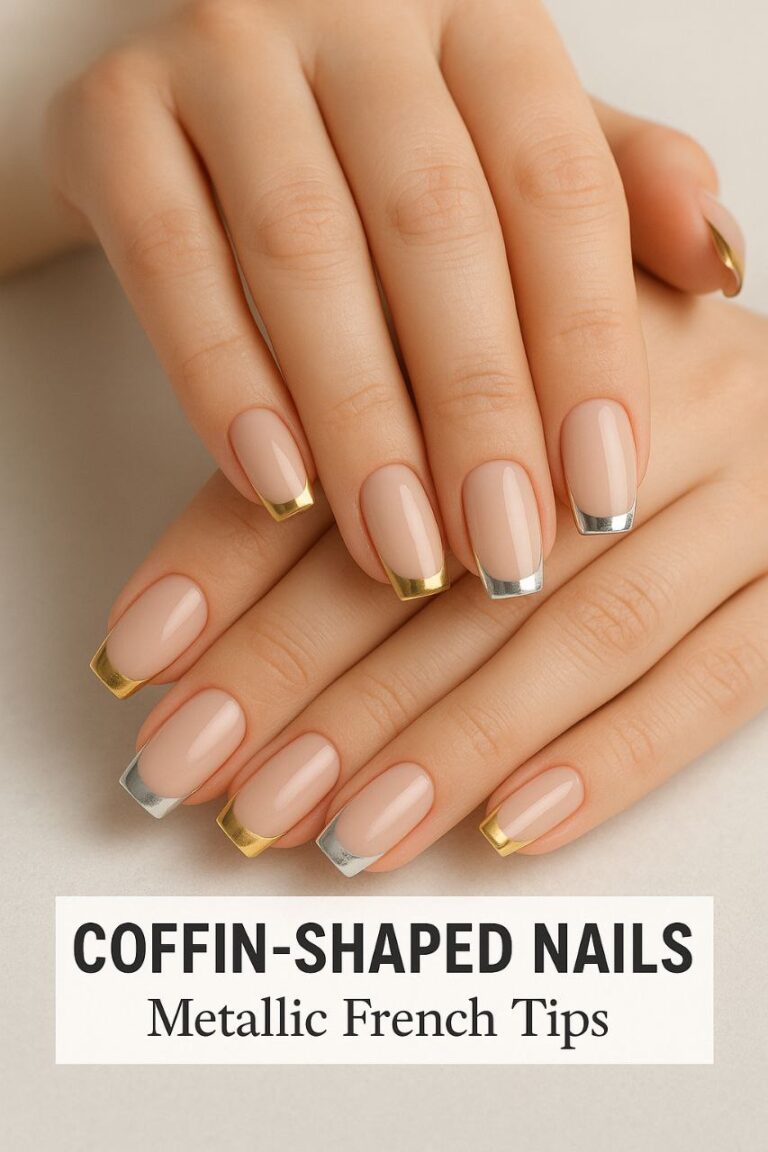
3. Rainbow French Tips
- Neutral base with rainbow chrome tips
- Perfect for moms who want a hint of fun without going all-in
- Pairs beautifully with gold or silver jewelry
4. Holographic + Chrome Fusion
- Chrome powder topped with holographic powder
- Looks like your nails came straight out of a galaxy
- Best under stage lights or sunset for festival magic
Mini Story: At a nighttime EDM festival, my nails literally reflected every laser. I swear someone thought I had tiny LED lights on my fingers.
5. Minimalist Rainbow Accents
- Nude nails with a single rainbow stripe or dot
- Chic, subtle, but still catches the light
- My personal favorite for day festivals where I need to wrangle kids and still look cute
Styling Tips: Make Your Nails Festival-Ready 🎉
Here’s where the mom-blogger-real-life tips come in:
- Pair with metallic jewelry – rings, bracelets, or tiny anklets reflect the same rainbow magic.
- Coordinate with makeup – glittery eyeshadow or highlighter creates a cohesive glow effect.
- Neutral outfits = nails star power – if your outfit is busy, rainbow nails are your statement piece.
- Maximalist fun – for full-on festival vibes, mix rainbow nails with glitter, rhinestones, and layered bracelets.
Mini Story: I once paired minimalist rainbow stripe nails with a full sequined outfit. People kept asking me if my nails were “part of the costume.” I nodded like it was intentional. Totally was.
Practical Mom Tips for Festival Nails
- Pack nail-safe wipes or a mini polish kit for emergencies
- Don’t try new designs on festival day—practice at home first
- Keep a neutral backup polish in your bag for small touch-ups
Parting Thoughts
The key with festival nails isn’t just looking good, it’s surviving the weekend while still feeling fabulous. Rainbow chrome nails do just that—they’re fun, versatile, and honestly, a confidence boost when you’re running between stages and snack stands.
Caring for Your Festival Rainbow Chrome Nails & Longevity Tips 💖
Alright, let’s be real. Rainbow chrome nails look AMAZING, but festivals are… chaotic. Between spilled drinks, sunscreen, kid chaos, and tent-pitching disasters, your nails can take a beating. I’ve been there.
Here’s how to keep them shining all weekend.
1. Protect Them From the Start
- Seal the edges – After applying your top coat, swipe a little along the tips. Trust me, it prevents the dreaded first-day chips.
- Thin layers rule – Thick layers are tempting because you think it’ll look shinier, but it actually makes polish more prone to cracking.
- Cure thoroughly – Every gel and top coat layer must be cured under the lamp. I’ve learned the hard way—skip a cure and your nail breaks mid-cheer.
Mini Story: At a daytime festival, I skipped sealing the tips on one hand because I was “running late.” By the end of the first set, two nails were chipped. I spent the next hour hiding my hand behind my water bottle. Never again.
2. Carry a Mini Festival Nail Kit
I always bring a tiny bag with:
- Clear top coat
- Nail file
- Mini nail buffer
- Extra rhinestones or stickers (for instant touch-ups)
Trust me, one spilled smoothie or a rogue sandstorm and you’ll be grateful you packed it.
3. Avoid Common Mom Mistakes
- Using nails as tools – I once opened a juice pouch with my nails. One snapped. Lesson: NO.
- Ignoring water and sunscreen exposure – Gloves are your friend if you’re helping kids with messy activities.
- Not letting nails fully cure before festival day – The excitement is real, but patience pays off.
Mini Story: I tried a new DIY design the night before a festival. I woke up to smudged nails and tears. True story. Stick to what you’ve practiced!
4. At-Home Care Post-Festival
After the fun ends:
- Soak-off gel remover – Avoid peeling nails, it weakens them.
- Moisturize cuticles – Chrome powder can be drying.
- Give your nails a break – I take a week between festivals to let mine breathe and recover.
Tip: I swear by a nourishing cuticle oil at bedtime. Makes nails feel baby-soft again.
5. Mini Hacks That Save Your Nails
- Quick sparkle refresh – Swipe a bit of top coat over dulled chrome and rub gently for a mirror finish.
- Tiny rhinestone repair – Lost a gem? Stick a new one with clear top coat. Instant fix.
- Festival-friendly nail shapes – Almond or rounded edges are less prone to breakage than square ones.
Mini Story: One year, I had to wrangle my twins while camping and still maintain my nails. Rounded edges + top coat touch-ups = survival mode success.
Parting Thoughts
Caring for festival nails is part technique, part common sense, and part experience. Even if you’re juggling kids, snacks, and festival chaos, you can have nails that survive the weekend—and look flawless doing it.
Festival Culture, Global Nail Trends & Inspiring Stories 🌍💅
Festivals aren’t just music and food—they’re a celebration of self-expression, and nails play a huge role in that. Over the years, I’ve noticed how rainbow chrome nails fit perfectly into festival culture, and how trends differ around the world.
Rainbow Chrome Nails Around the Globe
1. Coachella (USA) 🎵
- Known for boho vibes, flower crowns, and all the glitter you can handle
- Rainbow chrome nails pop against flowy dresses, fringe bags, and metallic sandals
- Personal anecdote: I paired my rainbow nails with a tie-dye maxi dress once, and people kept stopping to ask if my nails were “magical.” I nodded like it was intentional.
2. Holi (India) 🌈
- The festival of colors calls for nails that match the powder-covered environment
- Rainbow chrome nails resist looking muddy under splashes of bright powder
- Tip: Apply a good top coat to avoid color stains; I learned this the hard way after my first Holi.
3. Carnival (Brazil) 🎭
- Glitter, sequins, and costumes rule
- Chrome nails + rhinestones = instant samba-ready glam
- Real-life story: I attended a local carnival and added subtle rhinestones to my rainbow nails. One dancer asked if they could be photocopied—they were that sparkly.
4. EDM Festivals (Europe) 🔊
- Holographic + chrome fusion dominates here
- Stage lights bounce off nails like lasers
- My hack: Add a subtle glitter dust on top for extra light-catching drama
Why Rainbow Chrome Nails Work Across Festivals
- Versatility – Works for boho, glam, minimal, and maximalist styles
- Reflective fun – Catches stage lights, sunlight, and camera flashes
- Expressive color palette – Rainbows = joy, energy, and positivity
- Durability – Gel + chrome powders survive long festival days
Mini Story: I remember dancing for hours at a summer festival. Sweat, sunscreen, and spilled drinks everywhere—but my rainbow chrome nails still reflected the sunset perfectly. I felt like a tiny disco ball on my own hands.
Festival Nail Trends I’ve Observed
- Minimalist accents – Tiny stripes or dots of rainbow chrome on a nude base
- Full-spectrum nails – Each nail a different color in rainbow order
- Mixed textures – Chrome powder + holographic glitter or rhinestones
- Creative shapes – Almond, coffin, or stiletto shapes dominate festival nails
Real Insight: I’ve learned that subtlety can be just as striking as bold designs, especially if you want your nails to complement, not compete with, an elaborate festival outfit.
Personal Story: My Festival Nail Evolution
I started with chaotic DIY attempts—streaky, messy, but full of enthusiasm. After years of trial, error, and learning tricks from both salons and YouTube tutorials (while chasing my kids, of course), I now have nails that:
- Last the full weekend
- Survive accidental soda spills
- Pair effortlessly with outfits ranging from glittery bodysuits to boho dresses
And the best part? People notice them. Not the chaos, not the long lines, not even my messy hair. Just the nails.
Thoughts
Festival rainbow chrome nails aren’t just a trend—they’re a statement of creativity and joy. No matter the festival or the continent, nails are a small but powerful way to express yourself, feel confident, and even spark conversations with fellow festival-goers.
FAQs, Final Takeaways & Encouragement 🌈💖
Alright, mommas and festival queens, let’s tackle some questions I get all the time and leave you with a little pep talk to go rock those nails.
Frequently Asked Questions (FAQs)
Q1: Can I do rainbow chrome nails on short nails?
Absolutely! In fact, short nails are surprisingly versatile. You can do a full rainbow on each nail or just accent tips. I rocked almond-shaped rainbow nails for years, but short nails survived my toddler chaos way better.
Q2: How long do rainbow chrome nails last?
With proper gel application and sealing, up to 3–4 weeks. Honestly, my record was five weeks—but I wasn’t babysitting toddlers during that festival. 🙈
Q3: Can I mix chrome with other nail art?
Yes! Rhinestones, holographic powder, small stickers—you name it. My favorite combo? Chrome base with a single rhinestone accent on the ring finger. Subtle, yet people notice.
Q4: What’s the easiest way to fix a chipped rainbow chrome nail at a festival?
Carry a mini top coat or a clear polish. Dab it on the chipped area and gently rub. Quick, simple, and you’re good to keep dancing.
Q5: Can I DIY these nails at home if I’ve never done gel before?
Totally, but I recommend practicing first. Even a single practice session at home can save you tears and glitter explosions later.
Final Takeaways
- Prep is everything – Push back cuticles, buff lightly, and clean your nails. Chrome powders love smooth surfaces.
- Thin layers & curing – Every layer matters. Rushing is the fastest route to streaks.
- Chrome + top coat = longevity – Seal those edges, and your nails will survive the festival chaos.
- Have fun with it – Rainbow chrome nails are meant to express joy. Experiment with designs, accents, and textures.
- Mom hacks work – Mini kits, subtle rhinestones, and rounded nail shapes make all the difference.
Mini Story: One festival, my rainbow nails survived a 12-hour day of dancing, spilled drinks, and chasing kids. I came home exhausted but proud—and yes, I Instagrammed them immediately.
Encouragement to All Moms & Festival-Goers
Look, I get it. Festivals can be messy, hectic, and chaotic—especially if you’re juggling kids, friends, or just life in general. But your nails? They can be flawless, magical, and reflect your personality. Rainbow chrome nails aren’t just pretty—they’re confidence boosters, conversation starters, and little pieces of joy you can carry with you.
So yes, buy that powder, book that salon appointment, or try that DIY session after the kids are in bed. Spill a little glitter, laugh at a mess-up, and then proudly wave your nails in the sunlight. You deserve it.
Final Thoughts
Festival Rainbow Chrome Nails are more than a trend—they’re a small but mighty way to express yourself. They reflect your personality, your style, and your confidence. Whether you’re dancing in the sun, jumping to your favorite beat, or chasing little feet around the festival grounds, your nails can shine as brightly as your spirit.
Go on, try it. Make mistakes. Laugh at them. And then, watch your nails steal the spotlight. 🌈💅✨

Olivia Bennett
Hi, I’m Olivia Bennett, the creator of Styleandbeauty101. I started this blog to share my love for beauty, haircare, and skincare with women across the worldwide.
Here, I share practical routines, product reviews, tutorials, and trend insights designed to make beauty feel simple and fun. My goal is to help you discover what works best for your lifestyle so you can feel confident every single day.
Beyond blogging, I love experimenting with DIY beauty recipes, learning about cultural beauty rituals, and connecting with my amazing readers on social media.
