The Day I Got Obsessed with Foil Nails
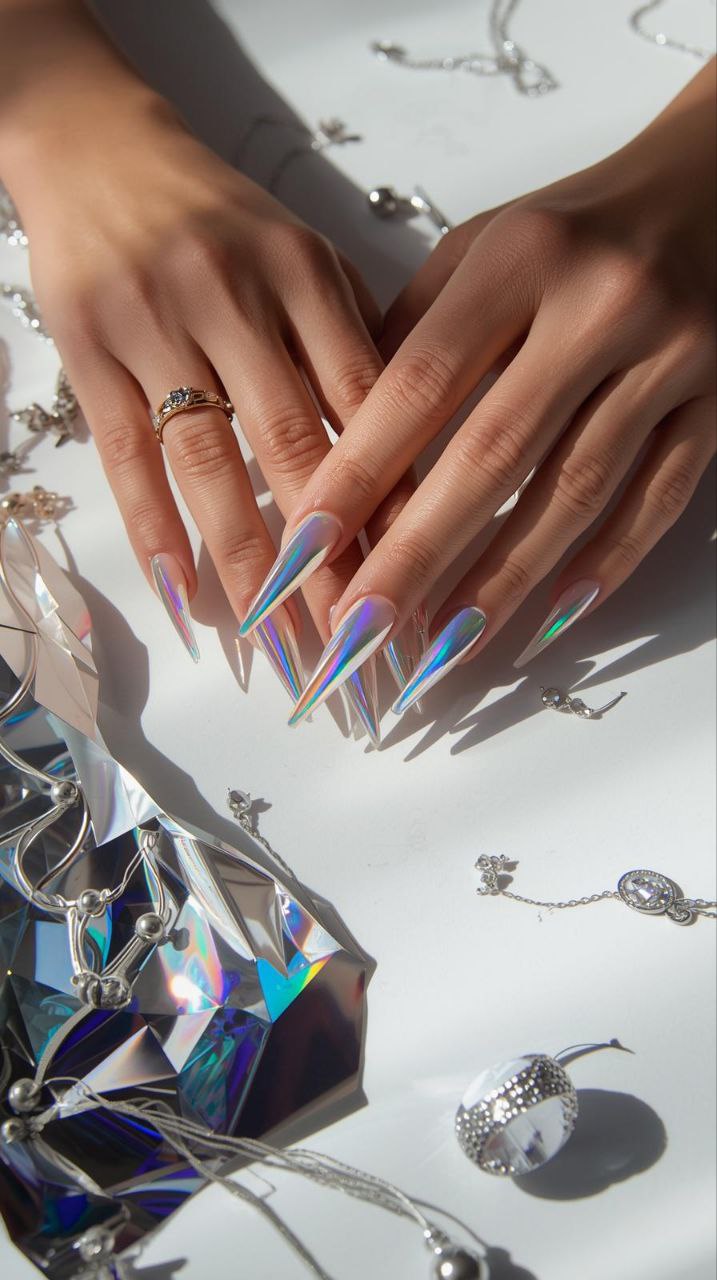
Okay, I have to tell you something embarrassing. The other day, I was waiting in the carpool line, minding my own business, and I caught the sunlight bouncing off my nails. And let me tell you… it was mesmerizing. Like, I had to literally tilt my fingers at every angle just to watch that rainbow dance.
That, my friends, is the magic of holographic foil accent nails.
I’d seen them on Pinterest, sure. And on Instagram. I even thought, yeah, I could never pull that off, too fancy. But then one quiet Saturday afternoon, with the kids finally napping, I decided… why not?
So there I was, sprawled across my kitchen table with tiny foil sheets, glue, and a bottle of black polish I’d been hoarding for months. My toddler peeked over the edge of the table and said, “Mom, whatcha doing?” I told him, “Creating magic,” which felt dramatic but also… accurate.
Little did I know, that one lazy Saturday would turn into a two-week saga of trials, errors, and tiny rainbow victories.
My First Holographic Foil Disaster 😅
Let me just be honest—my first attempt was a total trainwreck. I slapped glue on my nails, pressed the foil, and… peeled it back. Half the foil stuck. Half flew onto the table like confetti. I laughed, I cried a little, and I may have muttered a few colorful words under my breath.
Here’s what I learned:
- Timing is EVERYTHING. If your glue isn’t tacky yet, the foil won’t transfer properly.
- Pressure matters. Light pressure = sad, wrinkled foil. Hard pressure = slightly better foil, but now your thumb hurts.
- Surface prep is key. Any tiny bump or leftover polish = instant foil crinkle.
By the time I was done, I had one nail that looked like a disco ball, a few that looked like smashed candy wrappers, and a table covered in rainbow bits. My son thought it was hilarious. My husband… well, he wisely stayed out of the room.
The Moment I Knew I Was Hooked
Fast forward two days. I had one nail done perfectly, just one accent nail. And honestly? That single nail made me feel like I could conquer the world—or at least survive a grocery run without anyone judging me.
There’s something about holographic foil accent nails—they’re tiny, but they command attention. They make you stop and notice your own hands, even if your toddler just spilled juice on the couch five minutes ago.
Why I Keep Coming Back to Foils
- They’re quick yet impressive: Just one or two nails can elevate a boring manicure.
- They’re super versatile: Nude, black, pastel, or glitter combo—foil works with everything.
- They’re a mood booster: Every time the sun hits my nails, I smile. No coffee required (almost).
Honestly, for a mom like me who’s juggling school runs, Zoom calls, and snack requests, something as simple as watching a tiny rainbow flicker across my nails is… magical.
How to Apply Holographic Foil Accent Nails at Home 💅✨
Alright, so after my first foil disaster (you remember—the one that looked like smashed candy wrappers), I decided to actually figure this out. Turns out, you can get gorgeous, rainbow-y accent nails at home… even if you’re juggling toddlers, Zoom calls, and a very impatient dog.
Tools You’ll Need (Mom-Proof Version) 🛠️
Here’s my tried-and-true list that works for chaotic afternoons:
- Base coat – don’t skip this, your nails will thank you.
- Nail polish – I usually go for black, nude, or pastel, depending on mood.
- Holographic foil sheets – buy a small pack to start. Trust me, you’ll make mistakes, so extra sheets = life saver.
- Foil glue or transfer gel – makes the magic stick.
- Silicone applicator or eyeshadow sponge – easier than using your fingers and less sticky mess.
- Top coat – preferably gel if you want it to last longer than a day.
💡 Pro mom hack: Lay everything out before the kids wake up. Even five minutes of prep helps prevent chaos.
Step-by-Step Guide (With Real-Life Mom Notes)
- Prep Your Nails
File, buff, and push back cuticles. I usually do this while watching cartoons with my 3-year-old. Multitasking is a mom’s superpower. - Apply Base Color
Pick a polish that will make the foil pop. Black = drama. Nude = subtle elegance. Pastel = cute AF. Let it dry fully… or risk a smudged rainbow disaster. - Apply Foil Glue
Here’s the tricky part: the glue has to be tacky, not wet. My first attempt? Too wet. End result? Half the foil didn’t stick. Lesson learned. Wait 1–2 minutes for the perfect sticky-but-not-gooey texture. - Press the Foil
Shiny side up, press firmly using your applicator or sponge. Don’t rush—gentle but firm pressure. Think of it like giving your nails a tiny massage. - Peel Back Slowly
This is where patience pays off. Quick peels = wrinkled foil. Slow peel = magic rainbow transfer. I sometimes distract my toddler with a snack to get this part done without interruptions. - Seal With Top Coat
Always seal the edges to prevent peeling. Gel top coat = mom-proof longevity. I’ve had foils survive snack time, stroller rides, and even a toddler meltdown.
Real-Life Trial Tips
- Tiny Shards Work Wonders: If full coverage intimidates you, go for foil shards. I like scattering them over the tip of my nail like confetti. Looks intentional, trust me.
- One Accent is Enough: Don’t stress—just one nail per hand can turn heads. I once did two nails per hand and spent 30 extra minutes drying. Ain’t nobody got time for that.
- Lighting Matters: My best results? Near a window with natural sunlight. Fluorescent lights are a no-go for foil selfies.
My “Oops” Moments (Because Moms Will Relate)
- The Toddler Interruptions: Mid-press, my kid grabbed my hand. Result: wrinkled foil on my ring finger. Lesson: wait until nap time.
- Glue Overload: I globbed glue like I was frosting a cupcake. Ended with a sticky mess.
- Peel Panic: Peeling too fast made half the foil stick to my sponge. Tip: breathe, mama, breathe.
Honestly, these mistakes taught me more than any tutorial ever could. Foil nails require patience, but once you get the rhythm, it’s addictive.
Styling Tips While Applying
- Minimalist: Nude polish + one foil accent nail = office-friendly sparkle.
- Dramatic: Black polish + foil on ring finger = wow factor without overkill.
- Festival Fun: Mix pink, green, and gold foil for playful energy.
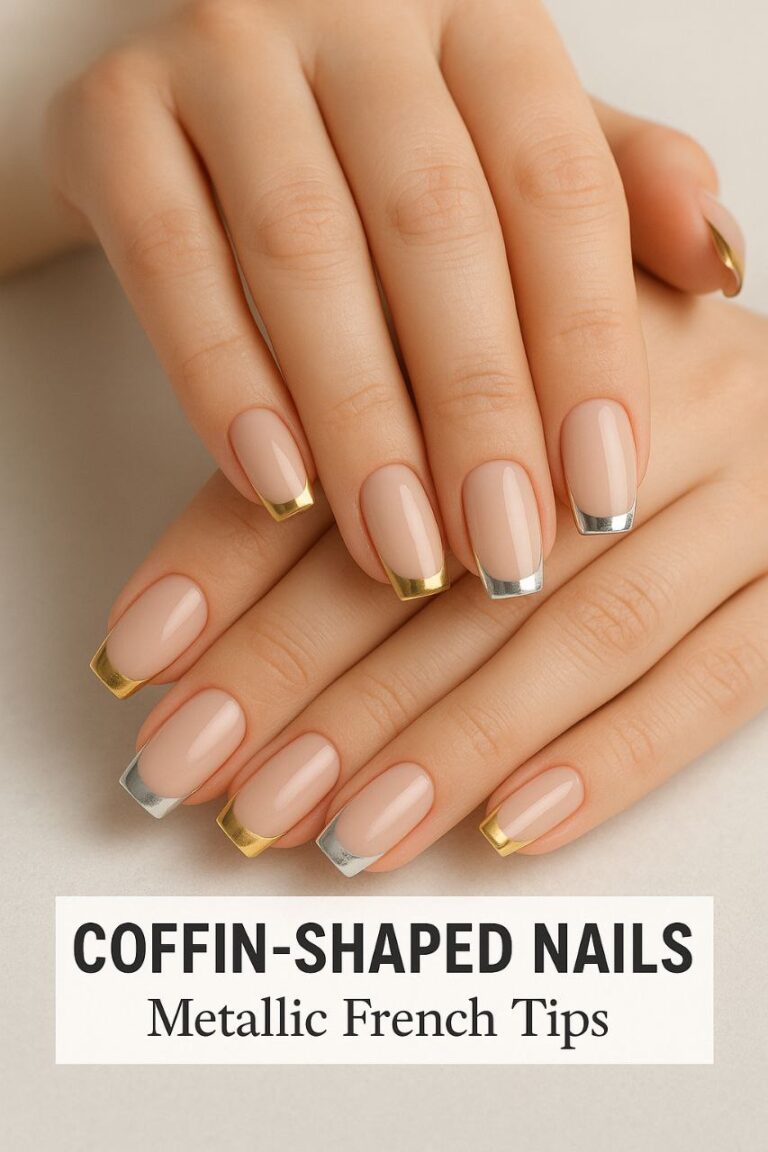
- French Twist: Apply foil only on the smile line of your nails—super chic for daytime outings.
💡 Personal tip: I keep a little “foil station” in a drawer with all my tools. That way, even 15 minutes of quiet is enough to create sparkle magic.
Styling & Maintenance for Holographic Foil Accent Nails 🌈💖
Alright, now that we’ve survived the application chaos (or at least, I have 😅), it’s time to talk styling and keeping your foil nails looking fabulous—even if you’re juggling kids, snacks, and Zoom calls.
Styling Inspirations I Actually Wear
I’ll be honest: not every design works in real life. I tried a full glitter-foil combo once… ended up looking like a walking disco ball at Target. Here’s what actually works for a busy mom:
1. Minimalist Chic
- Nude or soft pastel base
- One foil accent nail per hand
- Tiny foil shards sprinkled on tips
- Why I love it: subtle sparkle that doesn’t scream “I just got back from a party”
💡 Personal moment: I wore this to a school meeting, and a fellow mom whispered, “Your nails… wow.” Totally made me feel like I was winning at life, even though I’d spent the morning cleaning spilled cereal off the floor.
2. Cosmic Drama
- Black, navy, or deep burgundy base
- Full foil accent on ring finger
- Optional: tiny star stickers or rhinestones
- Why I love it: feels dramatic and polished, even if I’ve been up since 5 AM
Mini story: I once wore this design to a friend’s birthday brunch. I kept tilting my hands in the sunlight just to admire the rainbow flicker. She eventually asked, “Are you for real obsessed with your nails?” Guilty as charged.
3. Festival Glow
- Mix of pink, green, and gold foils
- Alternate accent nails for playful vibe
- Perfect for summer outings, festivals, or when you need a little happy sparkle
Real-life moment: My daughter insisted on painting “rainbows on my nails” while I held her hand steady. Result: slightly messy, perfectly imperfect mom-and-me manicure. Honestly, it’s my favorite because it’s so real.
4. Everyday Elegance
- French tips with foil on the smile line
- Reverse French: foil at the cuticle line
- Works for work, errands, or a casual coffee date
I wore this design to a PTO meeting once. No one knew it was a foil accent, but I knew. Little secret sparkles that only I could fully appreciate. Feels fancy without being over the top.
Longevity & Mom-Proof Maintenance
Let’s be real: foil nails are gorgeous, but they can chip if you’re not careful. Especially when your day involves:
- Tiny hands grabbing everything in sight
- Constant washing
- Accidental coffee spills
Here’s what keeps them looking fresh:
- Top Coat TLC: Seal edges well, and if possible, use a gel top coat for extended wear.
- Protective Gloves: Not glamorous, but necessary when washing dishes or handling sticky snacks.
- Quick Touch-Ups: Keep small foil bits or a mini nail kit in your bag. I’ve rescued my nails mid-playdate more times than I can count.
- Avoid Harsh Chemicals: Stick with mild soaps and lotions. Your nails and foils will thank you.
💡 Mom hack: I’ve even managed a three-day-old nap schedule and still kept my foil nails intact. Patience + top coat = magic.
Common Mistakes & How I Fixed Them
- Peeling too early – Wait for glue to be tacky. Learned the hard way.
- Over-applying foil glue – Less is more. One glob = stickiness disaster.
- Ignoring base prep – Rough nails = foil wrinkles. File, buff, clean.
- Skipping sealant – Foil loves to peel; a good top coat = life saver.
Foil vs Glitter vs Chrome
| Feature | Foil | Glitter | Chrome |
|---|---|---|---|
| Look | Rainbow, dimensional | Sparkly, flat | Mirror-like shine |
| Durability | 5–7 days normal, 2–3 weeks gel | 3–5 days | 1–2 weeks gel |
| Difficulty | Medium | Easy | Medium |
| Clean-Up | Easy | Messy | Medium |
| Style | Minimal or dramatic | Party or fun | Sleek, professional |
Foils strike the perfect balance: eye-catching, not over-the-top, and manageable for a mom’s hectic schedule.
Real-Life Mom Tip: Multitasking While Doing Foil Nails
I often do my nails while:
- Watching cartoons
- Timing snack prep
- Supervising homework
- Listening to a toddler lecture me about why dinosaurs are awesome
It’s doable, but patience + a small workstation is key. Trust me, a little prep goes a long way.
Personal Stories & Advanced Designs for Holographic Foil Accent Nails 🌟💅
By this point, I’d like to think I’m a semi-pro at foil nails. Semi. Not “I can do it blindfolded while juggling toddlers” pro… though some days, it feels like I need to be. 😅
Here’s the truth: the more you experiment, the more creative you get, and the more hilarious (or messy) the process can be.
The “I Can’t Believe I Did That” Moment
One Saturday, my husband was out, the kids were playing quietly (a rare miracle), and I thought, perfect time for a full foil experiment. I decided to do all ten nails. Yes, ten. Full-on rainbow extravaganza.
Fast forward 20 minutes:
- My toddler spilled juice on my kitchen counter
- My baby decided to try the foil sheet as a hat
- And somehow, my cat ended up with one tiny foil shard stuck to his paw
Result? A half-matched, rainbow disaster across my hands. But guess what? I didn’t care. I had fun, learned new techniques, and even took a cute “messy mom nails” selfie for Instagram.
Moral of the story: don’t stress perfection—sometimes the messiest sessions teach you the best tricks.
Advanced Designs I Actually Wear
1. Layered Foil Effects
- Start with a neutral base
- Apply multiple foil colors on one nail in overlapping patches
- Result: a “watercolor rainbow” effect that looks complicated but is easy with patience
Mini story: I wore this to my book club. My friend immediately said, “Whoa, your nails are like… abstract art!” I nodded sagely and pretended I’d planned it that way. Truth: 50% luck, 50% glue timing.
2. Foil + Minimalist Nail Art
- Nude or pastel base
- One foil accent nail per hand
- Add tiny hand-painted stars, dots, or lines with a thin brush
- Result: subtle but Instagram-ready
Real-life tip: I love this for weekend brunches. My nails sparkle in sunlight but don’t scream “party!”
3. Reverse French Foil
- Apply foil along the cuticle line instead of tips
- Pair with a soft pink or beige polish
- Result: elegant, clean, perfect for work or Zoom calls
Mom hack: This style survives snack time, homework help, and toddler hugs surprisingly well.
4. Foil Shards for Playfulness
- Break foil into tiny pieces
- Randomly place on a nail with clear polish
- Seal with top coat
- Result: artsy, fun, and mess-proof
I did this while my toddler “helped” me hold the foil. Half the shards went on the table, half on my nails. End result: perfect for a casual Saturday.
Real-Life Lessons from Two Years of Foil Nails
- Patience > Perfection: Rushing = wrinkled foil. Nap time = perfect nail time.
- One Accent Nail is Powerful: Less is often more. I can attest: one foil accent gets more compliments than a full rainbow disaster.
- Kids + Nails = Chaos + Laughs: Sometimes you just have to embrace the mess.
- Sunlight is Your Best Friend: Natural light shows off holographic magic way better than indoor lighting.
- Keep a Mini Kit Handy: Glue, foils, and small applicator = instant fix after minor disasters.
Mom-Friendly Tips for Foil Nail Success
- Prep Once, Apply Often: Keep your nails clean and buffed. Quick touch-ups later = easy.
- Divide & Conquer: Apply foils to one hand while the other is drying. Makes nap-time manicures feasible.
- Use Sticky Base Sparingly: Too much glue = foil disasters. Thin layer = perfect transfer.
- Top Coat = Lifesaver: Especially if your little one decides to “help” mid-manicure.
FAQs & Final Thoughts on Holographic Foil Accent Nails 🌈💖
After years of experimenting with foil nails—successes, disasters, and everything in between—I get asked the same questions over and over. So I figured, why not answer them like a friend giving you the real scoop?
FAQs: The Honest Mom Version
Q1: Can I do holographic foil accent nails on natural nails?
Absolutely. I started on my natural nails before committing to gel. Key is a sticky base or foil glue. I even did a full accent nail session while my toddler napped—it survived two snack spills and a “helpful” paw swipe from our dog.
Q2: How long do they last?
- Regular polish: 4–7 days if you’re careful
- Gel polish: 2–3 weeks (perfect for busy moms who can’t redo nails every weekend)
Q3: How do I remove foil without wrecking my nails?
Soak nails in warm water or acetone if using gel foils. My trick: wrap each nail in a tiny foil square soaked in acetone for 5–10 minutes. Peaceful me-time while I sip coffee. ☕
Q4: Can I use foils for work or school events?
Totally. I stick to one subtle accent nail per hand with nude or soft base colors. Subtle sparkle is classy and keeps you from looking like a disco ball at parent-teacher conferences.
Q5: Any tips for moms with little helpers?
- Prep everything ahead of time
- Use nap times or quiet play sessions
- Keep foil sheets and glue in a “mom-safe” drawer
- Embrace imperfections—they make your nails unique
Why Holographic Foil Accent Nails Are My Mom-Life Indulgence
I’ll be honest: being a mom means giving a lot, often to the point where I forget to do something just for me. Holographic foil accent nails are my tiny rebellion, my sparkly little joy.
They remind me that:
- I deserve sparkle in my day
- Beauty can coexist with chaos (even if my toddler spills juice mid-manicure)
- A small effort can yield big confidence—even a single foil accent nail can brighten my mood for hours
Real-Life Moments That Made Foil Nails Worth It
- One morning, I was typing emails while my son ate cereal next to me. I glanced down at my nails, and for a second, I forgot all the mess. Just me, my rainbow nails, and a tiny moment of peace.
- At a weekend brunch, another mom whispered, “Your nails… wow.” I didn’t just smile—I felt seen. Even tiny glittery moments matter.
Encouragement for Moms Trying Foil Nails
Listen, I know time is short and life is messy. But here’s my advice:
- Start small: One accent nail per hand. Tiny victory.
- Don’t fear mistakes: Wrinkled foil? A little charm.
- Use your moments: Nap time, snack prep, quiet TV time—perfect mini nail sessions.
- Celebrate the sparkle: You earned it, mama. You deserve this.
Final Thoughts
Holographic foil accent nails are more than just nail art—they’re a small, magical escape, a way to add beauty and joy to the chaos of mom life. They’re forgiving, versatile, and honestly… addictive in the best way.
So yes, go ahead. Grab those foil sheets, your favorite polish, and claim a little sparkle for yourself. Trust me, even one tiny accent nail can turn a hectic day into a rainbow moment.
💖 Your Turn: What’s your favorite foil design or your funniest nail fail? Share it below—I’d love to hear your stories. Let’s celebrate small joys, messy moments, and all the glittery little victories together.

Olivia Bennett
Hi, I’m Olivia Bennett, the creator of Styleandbeauty101. I started this blog to share my love for beauty, haircare, and skincare with women across the worldwide.
Here, I share practical routines, product reviews, tutorials, and trend insights designed to make beauty feel simple and fun. My goal is to help you discover what works best for your lifestyle so you can feel confident every single day.
Beyond blogging, I love experimenting with DIY beauty recipes, learning about cultural beauty rituals, and connecting with my amazing readers on social media.

