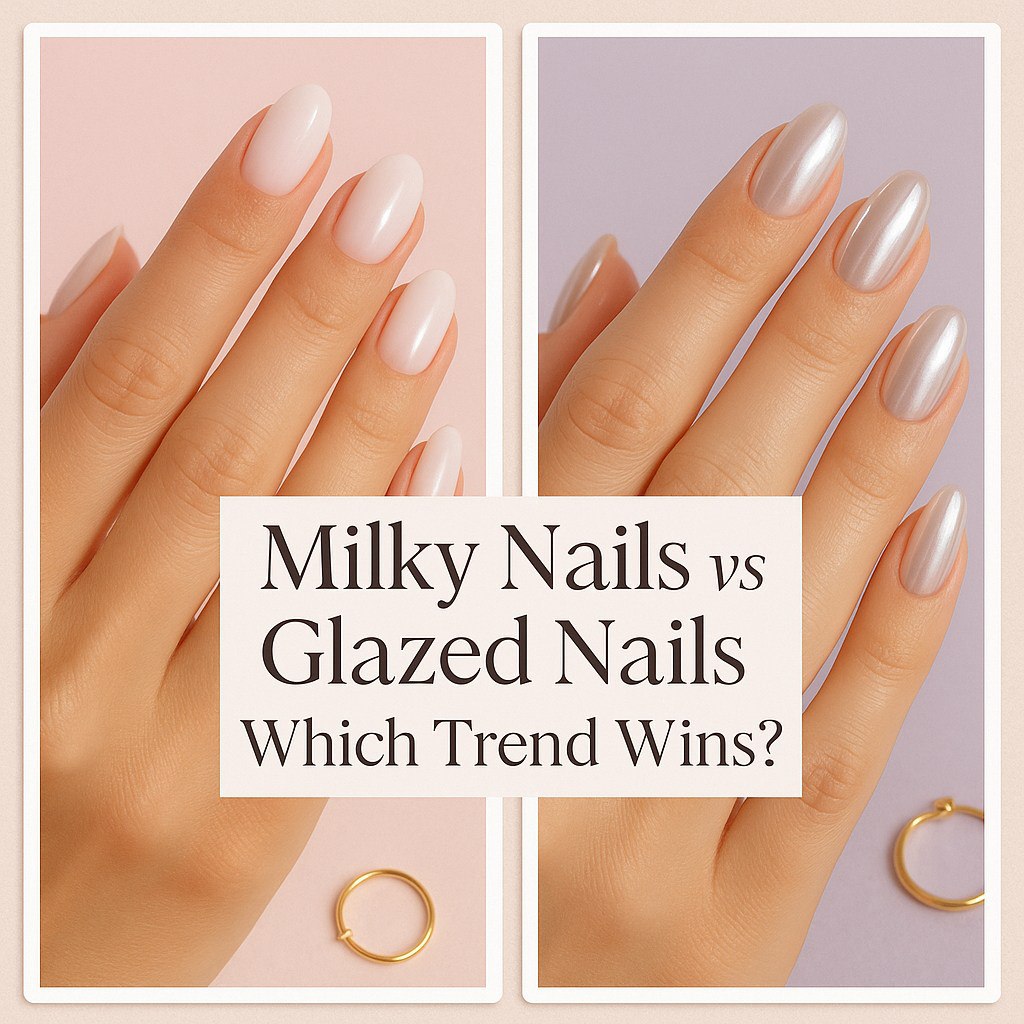

Part 1: Introduction & Why Tie-Dye Nails Are So Irresistible
Honestly, I never thought I’d become the kind of person who gets super obsessed over nails. I was more of a “throw on some chapstick, hope for the best” kind of girl. But then, one rainy Thursday morning, I stumbled across a picture of tie-dye effect nails, and wow…my brain went boom.
Picture this: soft swirls of lavender, mint green, and blush pink, all blending together like melted cotton candy on tiny canvases that just happened to be my nails. I remember my toddler trying to paint the walls with crayons in the next room, and I was just sitting there, staring at that picture, thinking, I need this. Like yesterday.
And that’s how my obsession with tie-dye nails began.
What I love about them is that they’re not about perfection. Nope. You don’t need straight lines or a perfectly even gradient. Imperfection is literally the charm here. Swirly, messy, quirky—these nails scream personality, creativity, and a little bit of chaos (just like motherhood, honestly).
Insert image here – close-up of pastel tie-dye nails on hand holding coffee mug
Why Moms Need Tie-Dye Nails Too
Let’s be real: being a mom is chaotic. There’s rarely a moment to sit down and do something just for yourself. And yet, somehow, tiny things like nail art can feel like a little rebellion. It’s a quiet “me time” that makes you feel a tiny bit glamorous, even when you’ve been wearing the same leggings for three days straight.
Tie-dye nails aren’t just cute—they’re therapeutic. Mixing colors, swirling patterns, and watching them come to life is oddly satisfying. And if your toddler decides to “help” by tapping your nail polish with their tiny fingers…well, you just call it modern abstract art.
Insert image here – mom doing DIY tie-dye nails at home with kid in background
Part 2: My First Tie-Dye Nail Attempt (Spoiler: It Was a Disaster 😅)
I remember it like it was yesterday. I had one foot in adulthood, one foot in a craft fail. I grabbed:
- A bottle of white polish (because duh, it’s a canvas)
- Three pastel colors I thought were dreamy together
- A toothpick because I didn’t have a fancy brush
- Zero patience
I tried swirling them together. And…let’s just say it looked like someone had sneezed on my nails. But here’s the thing—my friends loved it. They told me it looked artsy, creative, “like a cloud explosion.” And in that moment, I realized that tie-dye nails aren’t about perfection—they’re about fun, expression, and confidence.
Lesson learned: you don’t need to be perfect, you just need to enjoy the process.
Part 3: Why Tie-Dye Nails Are Perfect for Busy Moms
Here’s the deal: I don’t have hours to spend at a salon every week. But tie-dye nails? Totally doable at home in small increments. Even if you only have 20–30 minutes after the kids go to bed, you can create a beautiful mini masterpiece on your nails.
Some real-life mom hacks I use:
- One nail at a time: No need to do all ten fingers in one go. I start with two nails while my toddler watches a cartoon. By the time the second nail dries, the first is ready for top coat.
- Use sponges: Toothpicks are fine, but sponges create that soft watercolor swirl without stressing your hand.
- Mess is okay: Keep a cotton swab and remover handy. Mistakes become part of the design (my toddler’s accidental dab once made a gradient I actually loved).
Tie-dye nails are perfect for moms who need quick, creative, and forgiving nail art.
Insert image here – side-by-side of messy attempt vs finished tie-dye nails
Tie-Dye Nail Styles, DIY Techniques, and Tips for Moms 💅🌈
Different Styles of Tie-Dye Nails
I’ve experimented with every type of tie-dye nail under the sun. Some worked, some…well, let’s just say my toddler called them “funny colors.” Here’s what I’ve discovered:
1. Pastel Tie-Dye 🌸
Soft pinks, mint greens, lavender…these are like a bubblegum dream on your fingers. Perfect for spring brunches or when you just want something cute without screaming “look at me.”
Mom tip: Pastels are forgiving. If you smudge, it still looks intentional.
Insert image here – close-up of pastel tie-dye nails holding coffee mug
2. Neon & Bold Tie-Dye ⚡
I tried neon tie-dye during a summer festival once. Let me tell you: people stared. Not in a bad way—they couldn’t stop complimenting. Bright blues, hot pinks, and electric yellows make a statement and scream confidence.
Mom hack: Keep one neon nail as an accent if you’re too nervous to go full rainbow. Trust me, it still pops.
Insert image here – neon tie-dye nails with festival outfit
3. Monochrome & Moody Tie-Dye 🖤
Black, gray, navy, and muted purples. These are for the moms who want the tie-dye vibe without looking like a kid at a tie-dye workshop. Subtle but still artsy.
Personal story: I once wore a moody tie-dye manicure to a Zoom work call. My boss commented on my nails—I panicked—but it was a cool conversation starter.
Insert image here – moody monochrome tie-dye nails
4. Accent & Minimalist Tie-Dye 💅
Sometimes, less is more. I like doing just one or two nails in tie-dye, leaving the rest nude or soft pink. It’s chic, low-maintenance, and still fun.
Quick hack: Use striping tape or stencils for cleaner lines if you’re short on patience.
Insert image here – single accent tie-dye nail on hand
DIY Tie-Dye Nail Techniques
Doing tie-dye nails at home is totally doable—even if you’ve got toddlers running around. Here’s how I do it:
Tools You’ll Need
- White base polish (for pop)
- 3–5 colors of your choice (pastels, neons, or dark shades)
- Nail art brush or toothpick
- Makeup sponge (optional for soft blending)
- Clear top coat
- Cotton swabs and remover for cleanups
Step-By-Step DIY Method
- Prep: Shape and buff your nails. Apply base coat to protect your nails.
- Base Color: White works best for tie-dye because it makes colors pop.
- Color Dots: Randomly apply small blobs of your chosen polishes. Don’t overthink it.
- Swirl: Use a toothpick or nail brush to gently swirl the colors. If you mess up, it’s fine—tie-dye is supposed to be imperfect.
- Optional Sponge: Dab a sponge over the swirls for a watercolor effect.
- Top Coat: Seal it in to smooth the design and add shine.
Mom hack: Do one nail at a time while your kid watches a cartoon. By the time you finish, the first nail is ready for top coat. Efficient and stress-free.
Insert image here – step-by-step DIY tie-dye nail photos
Salon vs. DIY: Which Works for Busy Moms?
Salon Pros ✅
- Flawless results, especially with gel polish
- Long-lasting (2–3 weeks)
- No stress, just sit back and sip your coffee
Salon Cons ❌
- Expensive (usually $60–100)
- Time-consuming (1.5–2 hours)
- You can’t control the exact colors or style unless you’re super specific
DIY Pros ✅
- Affordable and fun
- Flexible—do it whenever you have free time
- You get full creative control
DIY Cons ❌
- Learning curve—some practice required
- Shorter lifespan unless you use gel
- Tiny hands (kids) may interrupt your process
Insert image here – side-by-side of DIY vs. salon tie-dye nails
Making Tie-Dye Nails Last Longer
After years of trial and error, I finally nailed a routine that makes my nails last longer:
- Always use a good base coat—trust me, it saves headaches.
- Seal the edges with top coat to prevent chips.
- Moisturize cuticles daily; dry cuticles = faster wear.
- Avoid using nails as tools (yeah, I still fail sometimes).
- Gel polish = magic. You’ll get 2–3 weeks without a single chip.
Pro mom tip: Keep a tiny bottle of top coat in your bag. A quick swipe fixes minor chips instantly.
Seasonal Tie-Dye Designs
I’ve found that tie-dye nails can be tailored for every season:
- Spring: Pastels with floral accents
- Summer: Neon tie-dye + glitter
- Fall: Warm earthy swirls (orange, brown, burgundy)
- Winter: Moody shades + metallic shimmer
Insert image here – seasonal tie-dye nail collage
Common Mistakes I’ve Made (So You Don’t Have To)
- Over-blending colors → turns muddy
- Skipping base/top coat → stains and chips
- Using too many colors → looks chaotic, not fun
- Impatience → nails smudge if not dried properly
Mini-Story: My Funniest Tie-Dye Fail 😂
One time, I tried neon tie-dye for a playdate. My toddler decided to “help” and poked at my nails with a plastic toy. Instead of panicking, I let it slide. Guess what? That “oops” ended up looking like a tiny galaxy on my nail. I learned to embrace imperfection—that’s the real beauty of tie-dye.
Insert image here – “galaxy-inspired” tie-dye fail turned design
My Personal Tie-Dye Nail Routines & Styling Secrets 💖💅
My Go-To Tie-Dye Nail Routine
I’ll be honest—before I figured out a routine, my tie-dye nails never lasted more than two days. Between diaper changes, Zoom calls, and toddler “help,” my manicures were basically destroyed before they even dried. But over the years, I’ve found a system that works. Here’s what I do now:
- Night Prep: I usually do my nails after bedtime. The house is quiet, coffee in hand, and my toddler is finally asleep. Total zen moment.
- Base Coat Magic: I never skip this. Even a cheap base coat is better than nothing, but I swear by my favorite long-wear formula—it keeps polish from staining my nails.
- Color Blobs First: I apply my tie-dye colors in random blobs. I don’t overthink placement. My mantra: perfection is boring.
- Swirl & Blend: Using a toothpick or a tiny brush, I swirl each nail. I love that small imperfection gives them character.
- Top Coat Seal: This is the secret to lasting nails. Two coats if I can, and I make sure to swipe the edges to lock the design.
Insert image here – step-by-step tie-dye nail routine photo
Mom tip: Keep a small fan or use your phone’s flashlight to dry nails faster. Trust me, it saves you from accidental toddler hand collisions.
My Favorite Color Combos
Over time, I’ve realized certain combos just speak to me. Here are my top picks:
- Pastel Dreams: Mint + lavender + blush pink. Soft, feminine, perfect for school drop-offs.
- Sunset Vibes: Orange + peach + coral. Reminds me of summer evenings at the beach.
- Galactic Glow: Dark blue + silver + purple. My go-to for a night out, or when I want to feel a little edgy.
- Rainbow Pop: Classic red, yellow, blue, green. Bold, playful, and guaranteed to get compliments.
Story: One day I wore my “Sunset Vibes” nails to the park. My neighbor’s teen daughter literally gasped and said, “Those are so cool!” I grinned like a mom who’d just won the nail lottery.
Advanced DIY Tricks for Moms
After a few years of trial and error, I’ve picked up tricks that make DIY tie-dye nails easier and more fun:
- Sponges for Watercolor Effect: Instead of swirling with a toothpick, lightly dab polish with a sponge to create soft, dreamy gradients.
- Single Accent Nail: If you’re short on time or confidence, do just one nail in tie-dye. It still makes a statement.
- Mixing Finishes: Matte + glossy layers can add depth and dimension. I once did a pastel matte background with glossy tie-dye swirls—it was like magic.
- Glitter or Metallic: Adding a tiny hint of shimmer or metallic polish to the swirl makes it look salon-ready. Even a toddler-inspired dab can look intentional.
Insert image here – creative DIY tie-dye nail hacks photo
Matching Tie-Dye Nails With Outfits
Tie-dye nails aren’t just for weekends—they can complement everyday looks. Here’s how I style mine:
- Casual Mom Days: Pair pastel tie-dye nails with denim jeans and a soft tee. Adds a little “me time” glam to a hectic morning.
- Date Nights: Dark or metallic tie-dye nails with a simple black dress. Instant edgy elegance.
- Playdates & Parks: Neon accents on one nail, paired with sneakers and a comfy hoodie. Fun, casual, and kid-friendly.
- Office-Approved: Neutral-toned tie-dye on accent nails. Subtle, sophisticated, but still artsy.
Mini Story: Last week, I matched my mint + lavender tie-dye nails with my toddler’s unicorn t-shirt. He freaked out, thinking our nails were twins. I couldn’t stop laughing.
Common Tie-Dye Nail Struggles & How I Solve Them
- Problem: Smudging during drying
Solution: Use a fan or quick-dry top coat. Multi-tasking moms, this is life-saving. - Problem: Colors blending into a muddy mess
Solution: Layer colors gradually. Less is often more. - Problem: Chips after a few days
Solution: Swipe top coat every 2–3 days. Moisturize cuticles. Treat nails gently.
Story: I once ignored the top coat for a busy week. My nails looked like a tiny apocalypse by Thursday. Lesson learned—never skip the seal.
FAQs About Tie-Dye Effect Nails
Q1: Can I do tie-dye nails at home?
Absolutely. Even with little time. Start small, use sponges for soft effects, and embrace imperfection.
Q2: How long do tie-dye nails last?
Regular polish: 3–5 days. Gel: 2–3 weeks if you seal the edges properly.
Q3: Do tie-dye nails work for short nails?
Yes! Swirls make short nails look playful and fun. I personally love accent tie-dye on short nails—it’s subtle but still artsy.
Q4: Which colors are easiest for beginners?
Pastels. Mistakes blend in, and it’s easier to control than neons or dark shades.
Q5: Any tips for messy kids interfering with nails?
Set up a “nail station” with a small table, cover surfaces, and let them do their own mini art project nearby. It keeps them occupied and makes your time less stressful.
Mini Story: My Most Creative Tie-Dye Moment 🌟
One rainy afternoon, I decided to try metallic silver + pastel pink + lavender. My toddler “helped” by pressing a crayon on my hand. Honestly? It ended up looking like a miniature galaxy on my nail. I showed it to my friends, and they loved it. I realized creativity doesn’t have to be perfect—it just has to be yours.
Insert image here – mom-inspired metallic pastel tie-dye nails
Wrap-Up
By now, you probably see why tie-dye nails are my personal obsession. They’re playful, forgiving, and totally customizable. Even with a toddler running around, I can find a few quiet moments to create art on my fingertips. And honestly, that little slice of self-care makes a huge difference.
Tie-Dye Nails in Real Mom Life & Seasonal Inspiration 🌈💖
How Tie-Dye Nails Survive Mom Life
Let me be real—tie-dye nails aren’t just a cute trend, they’re a test of patience and creativity for any mom. Between school drop-offs, snack spills, Zoom meetings, and toddler “emergencies,” nails can get beat up fast.
Here’s how I make mine survive the chaos:
- Protective Top Coat: I can’t stress this enough. Swiping a quick coat every 2–3 days keeps nails shiny and prevents chips.
- Gloves for Chores: Washing dishes or scrubbing counters? Gloves are your BFF.
- Mini Touch-Ups: I keep a tiny brush and leftover polish for instant fixes. I swear by this—it saves you from looking like a hot mess when life happens.
- Quick Drying: I use a small desk fan or my phone flashlight for drying. It sounds silly, but it works, especially when a curious toddler is around.
Story: Last Tuesday, my toddler spilled juice all over the couch while I was doing touch-ups. Instead of panicking, I laughed, cleaned the mess, and realized the little imperfections just made my nails feel “lived-in” and personal.
Insert image here – mom doing touch-ups on tie-dye nails while kid plays nearby
Seasonal & Holiday Tie-Dye Nail Ideas
Tie-dye nails are super versatile—they can match your mood, outfit, or even the season. Here are my favorite combos:
Spring 🌸
- Colors: Pastel pink, lavender, mint green
- Vibe: Soft, dreamy, brunch-ready
- Mom Tip: Add a small floral accent on one nail for a whimsical touch
Summer ☀️
- Colors: Neon pink, orange, bright yellow
- Vibe: Bold, playful, festival-friendly
- Story: I wore neon tie-dye nails to a beach BBQ. Everyone complimented them, and my kid thought I’d magically painted the sun on my nails.
Fall 🍂
- Colors: Burgundy, burnt orange, mustard
- Vibe: Cozy, autumnal, pumpkin spice-approved
- Tip: Add gold flecks to mimic falling leaves
Winter ❄️
- Colors: Dark navy, silver, deep purple
- Vibe: Chic, moody, holiday-party-ready
- Mom Hack: Metallic top coat gives it a festive sparkle
Holidays 🎄🎃🎆
- Tie-dye isn’t just for casual days—it works for holidays too! I’ve done Halloween tie-dye with black, orange, and purple, and Christmas versions with red, green, and white swirls. My kids loved it, and honestly, I got compliments at the pumpkin patch and holiday parties.
Insert image here – seasonal tie-dye nail collage with captions
Long-Term Maintenance Tips
If you want your tie-dye nails to last and keep looking fresh, here’s my mom-tested routine:
- Base Coat Every Time: Protects nails and prevents staining.
- Top Coat Touch-Ups: Every few days to prevent chips.
- Moisturize Cuticles Daily: Dry cuticles = peeling polish. I use cuticle oil while waiting for my morning coffee to brew.
- Avoid Nail-as-Tool Moments: I know it’s hard, but try not to open cans or peel stickers with nails. I’d’ve ruined my first tie-dye attempt if I hadn’t learned this.
- Gel Polish for Longevity: If you want 2–3 weeks of wear, gel is worth it.
Story: One week I ignored touch-ups and top coat. By Friday, my nails looked like they’d survived a toddler apocalypse. Lesson learned: consistency is key, but tie-dye can survive a little chaos.
My Most Memorable Tie-Dye Nail Moments
- Playdates: Kids love seeing your colorful nails. Sometimes they try to “help,” which usually ends in creative accidents. I embrace it—it adds personality.
- Work Zoom Calls: I’ve gotten compliments from coworkers. Tie-dye nails are an unexpected conversation starter.
- Family Photos: Tie-dye nails pop in pictures! I once matched my nails with my toddler’s unicorn shirt—it was too cute to handle.
Encouragement for Other Moms
If you’ve been hesitant to try tie-dye nails because you’re busy, messy, or unsure, let me tell you: go for it. Imperfection is part of the fun. These nails don’t have to be perfect—they just have to make you happy.
- Start small—maybe one accent nail.
- Embrace colors you love, even if they clash.
- Treat it as a tiny self-care ritual, not a chore.
Tie-dye nails are a little rebellion, a tiny moment of creativity, and a way to feel vibrant even when life is hectic. And honestly, that’s worth the smudges, spills, and occasional chaos.
FAQs
Q1: Are tie-dye nails hard to do at home?
Not at all! Start with pastels, one nail at a time, and don’t worry about perfection.
Q2: Can kids help with DIY tie-dye nails?
Totally! Give them a tiny sponge or brush and let them add one nail. It’s fun and safe, and usually turns out adorable.
Q3: How do I make tie-dye nails last longer?
Base coat, top coat, cuticle oil, and a little patience. Gel polish is ideal if you want extra longevity.
Q4: What if I mess up the swirl?
Embrace it. Tie-dye is supposed to be imperfect. Sometimes accidents look the coolest.
Q5: Do tie-dye nails suit short nails?
Yes! Swirls actually look better on short nails because each nail becomes a mini canvas of abstract art.
Conclusion: Why Tie-Dye Nails Are a Mom’s Tiny Luxury 💖
Honestly, tie-dye nails are more than just a trend. For me, they’re a little pocket of joy, a creative escape, and a confidence booster. They remind me that even in chaos, I can take a few minutes for myself, create something beautiful, and embrace imperfection.
So, whether you’re a mom chasing toddlers, working from home, or just someone who loves a little color in life, I highly recommend giving tie-dye nails a shot. Imperfect, playful, and full of personality—just like motherhood itself.
Insert image here – final collage of various tie-dye nail designs
✅ Call to Action:
Have you tried tie-dye nails yet? Share your favorite colors or your funniest nail “oops” moment in the comments! 💌 And if you’re inspired, grab your favorite polishes and create a little magic on your fingertips today.

Olivia Bennett
Hi, I’m Olivia Bennett, the creator of Styleandbeauty101. I started this blog to share my love for beauty, haircare, and skincare with women across the worldwide.
Here, I share practical routines, product reviews, tutorials, and trend insights designed to make beauty feel simple and fun. My goal is to help you discover what works best for your lifestyle so you can feel confident every single day.
Beyond blogging, I love experimenting with DIY beauty recipes, learning about cultural beauty rituals, and connecting with my amazing readers on social media.