Okay, confession time. Every February, I tell myself I’m not gonna go “all out” for Valentine’s Day. I mean, I’m a mom—most days I’m lucky if I can get mascara on before school drop-off. But then Target puts up their aisles of pink candy, heart-shaped mugs, and—yep—Valentine’s Day nail polish displays. And suddenly, I’m standing there, holding a blush pink nail polish bottle like it’s a long-lost friend.
And honestly? Valentine’s Day Blush Pink Nails . They’re soft, romantic, a little girly (in the best way), and they somehow make me feel like I’ve got my life together—even when my toddler just dumped Cheerios all over the minivan.
Why I Always Reach for Blush Pink in February
Here’s the thing. Red nails scream Valentine’s, sure. But blush pink? They whisper it. There’s something effortless and chic about them. Like, “I didn’t try too hard, but yes, I’m festive.” Plus, they go with literally everything—from a cozy sweater and jeans to that one lacy top I only bring out once a year.
I wore blush pink nails on Valentine’s Day last year when my husband and I finally got a sitter and went to dinner. And no joke—the waitress complimented my nails before she even took our order. I’m not saying blush pink nails bring good luck, but let’s just say dessert was on the house that night. 😉
A Little Nail Nostalgia
Quick side note: growing up, my mom would always do her nails before Valentine’s Day. I remember sitting on her bed, watching her carefully paint this pale, glossy pink while she told me it made her feel “pretty, but not flashy.” At the time, I didn’t get it—I was all about glitter and neon (hello, middle school). But now? I get it. There’s something timeless and grown-woman classy about blush pink nails.
So yeah, for me, it’s more than a color. It’s a vibe. A tradition. A tiny little reminder that even in the chaos of motherhood, I can still carve out these small, pretty rituals that make me feel like me.
The Allure of Blush Pink
So let’s talk about why blush pink is basically the MVP of Valentine’s nails. Because it’s not just about looking cute (although, let’s be real—that’s a big part). There’s actually a whole vibe behind the color.
Color Psychology: Why Blush Pink Just Works
Okay, I’m no scientist, but hear me out. Colors carry energy. Red is bold and passionate. White feels clean and simple. And pink? Pink is all about warmth, sweetness, and comfort. But blush pink specifically—oh girl—it’s like the soft hug version of pink. It says, “I’m romantic, but I’m not trying to blind you with neon bubblegum vibes.”
Whenever I’ve got blush nails, I swear people treat me differently. My neighbor once said, “You always look so polished when you wear those soft pinks.” Meanwhile, I had spit-up on my hoodie and a messy bun that hadn’t seen dry shampoo in three days. So… yeah, maybe blush pink has magical powers.
The Trend That Never Dies
If you scroll Instagram or TikTok around February, what do you see? Sure, there are wild heart designs, glitter, even full-on 3D nail art that looks like mini cupcakes (seriously, how do moms function with those?). But blush pink always makes an appearance.
Why? Because it’s timeless. Trends come and go—like the whole “duck nail” thing (I tried it once, never again)—but blush pink nails? They’ve been around since, well, forever. Audrey Hepburn wore them. Your grandma probably did too. And they still look modern today. That’s staying power.
When I Realized Blush Pink = Confidence
Here’s a funny little story. A couple of years ago, I had this big parent-teacher meeting for my oldest. Normally, I’d be rushing in with chipped nails, juggling snacks, and praying I remembered all the forms. But that week, I happened to have blush pink gel polish on.
I walked in, sat down, and suddenly felt… put together. Like, “Yeah, I might have three loads of laundry at home, but look at these nails. I’m thriving.” And you know what? That little boost of confidence changed my whole mood. The teacher probably thought I had my life perfectly organized (spoiler: I didn’t). But hey, sometimes it’s all about what’s on the surface.
Blush Pink = The “Neutral but Not Boring”
One of my favorite things about blush pink? It’s like the middle ground between bold and basic. You can rock it to:
- A Valentine’s dinner with your partner 💕
- School pickup without feeling overdressed 🚗
- Zoom meetings where you just want to look polished 👩💻
- Girls’ night in with wine and takeout 🍕🍷
It fits everywhere. And unlike red, it doesn’t scream for attention. It’s more like that friend who quietly makes the room better just by being there.
Finding Your Perfect Shade of Blush Pink
Here’s the thing: not all blush pinks are created equal. I learned this the hard way when I grabbed a random drugstore polish that looked super cute in the bottle… but on my hands? Yikes. It turned this weird, chalky shade that made me look like I had mannequin fingers. Lesson learned.
So let’s break it down—because picking the right blush pink for your skin tone is the difference between “Wow, gorgeous!” and “Why do my nails look like I just painted them with correction fluid?”
Shades of Blush Pink (Because Yes, There Are Many)
When people say “blush pink,” it sounds simple. But walk into any nail salon and you’ll see a whole wall of pinks, and suddenly your brain freezes. I swear I once stood there for 15 minutes while my toddler kept asking if she could have “the sparkly purple one.”
Here are the main types of blush pink you’ll probably run into:
- Soft Baby Blush – That barely-there pink that almost looks like a nude. Perfect for a clean, minimal vibe.
- Peachy Blush – A pink with a warm undertone. Looks sunny and happy, especially on medium to tan skin.
- Rosy Blush – Has a hint of red, so it feels a little more romantic and bold.
- Dusty Blush – A muted, almost mauve tone. Super chic and modern.
- Milky Blush – The creamy, “jelly” style pink that feels very K-beauty inspired.
How to Pick the Right One for Your Skin Tone
I’m not a professional nail tech, but after years of trial and error (and way too many “nope” moments), here’s what I’ve learned:
- Fair skin → Go for peachy or soft blush. Bright pinks can wash you out.
- Medium/olive skin → Rosy and dusty blush tones look amazing. They balance out warmth without looking too pale.
- Tan skin → Milky or peachy blush pops beautifully. Think vacation nails.
- Deep skin tones → Bold rosy blushes or mauve/dusty pinks are stunning. They stand out without looking ashy.
And honestly? Rules are made to be broken. If you love a shade, wear it. Confidence always trumps undertones.
My Personal “Wrong Shade” Fail
Okay, mini-storytime: Last Valentine’s Day, I thought I’d be “different” and went with a pale, chalky baby pink. In the salon lighting, it looked fine. But then I went home, made dinner, and glanced at my hands while chopping onions. Let’s just say… it looked like I had Barbie hands, and not in a cute way.
Even my husband (who literally never notices nails) said, “Is that supposed to look like that?” Ouch. Two days later, I slapped on a dusty rose topcoat, and suddenly it was saved. Moral of the story: test the shade against your skin before fully committing.
Nail Art or Keep It Simple?
Blush pink nails can be a blank canvas. You can:
- Keep them simple + glossy → classic, chic, done.
- Add subtle glitter → like tiny stars for that Valentine sparkle ✨.
- Do a French tip twist → blush base with a white or glittery tip.
- Pop on heart accents → perfect for the holiday, but still low-key.
Personally, I lean simple because, well… life. Between school drop-offs and trying to get three kids to bed on time, I don’t have the patience for 3-hour nail art appointments. But hey, if you’re into it—go for it.
DIY Valentine’s Day Blush Pink Nails (Because Who Has Time for the Salon Every Week?)
I’ll be honest with you: I love the feeling of leaving a nail salon. Fresh polish, cuticles cleaned up, that tiny massage at the end—chef’s kiss. But let’s get real: between school pickups, making sure my kids don’t live off mac and cheese, and trying to remember when I last washed my own hair… weekly salon visits? Yeah, not happening.
That’s where DIY nails come in. Over the years, I’ve picked up little tricks that make doing my own nails way less frustrating—and actually kinda relaxing. Like, “me time” relaxing. (As long as no one barges in asking where the goldfish crackers are.)
Step 1: Start With a Good Nail Prep
I used to skip this step. Big mistake. Turns out, 80% of whether your polish lasts is all about prep. Here’s my routine now:
- Remove old polish (obvious, but don’t rush it).
- Shape nails → I go for a rounded square because it chips less for me.
- Push back cuticles → Nothing fancy, just a wooden stick.
- Buff lightly → Makes the surface smooth so the polish grips better.
👉 Tip from experience: If you skip buffing, your polish will literally peel off in sheets the next day. Been there.
Step 2: Base Coat is Non-Negotiable
I used to think base coats were a scam. Like, “Why add another step?” But then I noticed how stained my nails got from darker pinks. Now, I never skip it. It:
- Protects nails from stains
- Helps polish stick better
- Makes everything look smoother
Think of it as primer for your nails. Would you paint a wall without primer? Exactly.
Step 3: Pick Your Blush Pink Shade
Here’s where it gets fun. For Valentine’s Day, I usually lean toward:
- Soft blush with a glossy finish → timeless.
- Blush pink with a tiny shimmer → looks extra romantic under candlelight.
- Ombre blush → a little trickier at home, but sooo worth it if you nail it.
When I’m short on time, I grab my trusty “milky blush” polish because it’s super forgiving. Even if I smudge a little, it still looks decent.
Step 4: Application Tricks That Changed Everything
Okay, here’s the part where most of us mess up. I used to glob it on thick, thinking thicker = faster. Nope. That’s how you end up with sheet marks and bubbles.
Now I do:
- 3 thin coats, not 2 thick ones. It takes longer, but dries faster overall.
- Cap the free edge. That’s just a fancy way of saying “swipe the brush over the nail tip.” Helps prevent chips.
- Don’t flood the cuticles. Leave a tiny gap around the edge. Looks cleaner and lasts longer.
👉 Personal hack: I paint my nails while sitting at the kitchen table with a podcast playing. Keeps me still, and if the kids run in, at least I’m not balancing polish on the couch.
Step 5: Seal It In With Top Coat
Top coat = your best friend. It makes everything glossy, locks it in, and gives you that “I totally went to a salon” finish.
- If I’m in a rush → quick-dry top coat.
- If I want max shine → gel-like top coat.
- If I know I’ll be doing dishes all week → matte top coat (because chips don’t show as much).
Mom-Life Tested Hacks for Longer-Lasting Nails
Because what’s the point of doing them if they chip the next day, right?
- Gloves while doing dishes. I fought this for years. Finally gave in. Total game changer.
- Reapply top coat every 2–3 days. Keeps that shine fresh.
- Avoid hot showers right after painting. The polish is still “curing.” I once ruined a fresh mani because I thought it was dry enough to wash my hair. Spoiler: it wasn’t.
When All Else Fails… Press-Ons to the Rescue
Let me tell you, I used to roll my eyes at press-on nails. But the new ones? Gorgeous. Blush pink, glossy, some even with tiny rhinestones. And they can last a full week if you apply them right.
Last Valentine’s Day, I slapped on blush pink press-ons 20 minutes before dinner, and my husband thought I had just come from a salon. Best $8 I ever spent.
Salon-Perfect Blush Pink Nails (What the Pros Do Differently)
As much as I love a good DIY nail night, there’s just something about walking into a salon that feels… indulgent. The smell of polish (in a weirdly comforting way), the hum of nail drills, that little sigh of relief when someone else takes over and you don’t have to lift a finger—literally.
And when it comes to Valentine’s Day blush pink nails, salons bring out the big guns. It’s not just polish—it’s techniques, products, and little details that make them last weeks instead of days.
Gel, Dip, Acrylic: What’s the Difference?
I’ll never forget my first gel manicure. I thought, “Oh, it’s just shiny polish.” Wrong. I walked out feeling like a whole new woman. Here’s a quick breakdown of what you’ll usually get offered:
1. Gel Manicure
- Cured under a UV/LED lamp.
- Super glossy, lasts 2–3 weeks.
- Doesn’t chip easily (hallelujah).
- Removal is a bit of a process—soak, wrap, patience required.
✨ Blush pink tip: Gel makes soft, milky blush shades look like glass. Perfect for that romantic, candlelit Valentine’s vibe.
2. Dip Powder
- Layers of colored powder sealed with a clear coat.
- Lasts even longer than gel—sometimes 4 weeks.
- A little thicker, feels sturdier.
- Downsides? Removal can be rough on nails if not done right.
✨ Blush pink tip: Dip is fab for ombre blush pink looks because the powder blends so smoothly.
3. Acrylics
- Extensions made with liquid + powder that harden.
- Great if you want length or dramatic nail shapes (coffin, almond, stiletto).
- Super durable.
- Needs fills every couple of weeks as nails grow out.
✨ Blush pink tip: If you love blush pink but want extra drama, acrylics give you that long, elegant canvas for Valentine’s nail art—think tiny rhinestone hearts or metallic tips.
Little Extras Nail Techs Do (That I Can Never Replicate at Home) 🪄
- Cuticle cleaning → They somehow make it look neat, not angry.
- Perfect polish placement → Always that teeny-tiny gap around the edges that makes it look pro.
- Even thickness → My at-home attempts sometimes look like one nail has 4 coats and another barely has 1. Techs? Flawless every time.
- Massage + warm towel → Okay, maybe not essential for polish, but it’s basically self-care therapy.
Is It Worth the Splurge?
Here’s my real-talk breakdown:
- Worth it:
- Special occasions (Valentine’s, anniversaries, weddings).
- When you want nail art that actually looks precise.
- If you’re traveling and don’t want to bother with touch-ups.
- Skip it:
- If you’re short on time or $$ (press-ons or DIY will do).
- If you like changing your polish every few days.
For me? Valentine’s Day is one of those times I’ll happily book a salon slot. It feels like part of the celebration, almost like buying yourself flowers.
My Salon Fail Story
Quick confession: I once went in so sure I wanted glitter blush pink nails for Valentine’s. I showed the nail tech this Pinterest photo (you know the ones—perfect lighting, perfect nails). She nodded, smiled… and then layered on what can only be described as disco-ball pink. I looked like I was ready for a middle school dance, not a romantic dinner.
Moral of the story: be specific. If you want subtle sparkle, say “fine shimmer” not “glitter.” Trust me on this.
Pro-Tips to Ask Your Nail Tech for Valentine’s Blush Pink Nails
- “Can you keep it sheer and glossy?” → for that clean, romantic vibe.
- “Can we do an ombre fade?” → gives dimension without looking too bold.
- “Can you add a matte top coat?” → makes blush pink look super modern.
- “Just one accent nail with tiny hearts?” → subtle but festive.
Styling Blush Pink Nails With Outfits, Jewelry & Makeup
So you’ve got your Valentine’s Day blush pink nails on, and they’re looking chef’s kiss. But here’s the truth—your nails don’t exist in a vacuum. They’re part of the whole vibe. Outfit, accessories, makeup… it all ties together. When you nail (pun intended) the styling, your blush pink mani becomes the quiet little star of the night.
Blush Pink Nails + Outfits
What I love about blush pink is that it’s so versatile. It’s soft, neutral-ish, but still romantic. Here are some outfit pairings I’ve tried (and seen work like magic):
- Classic Red Dress + Blush Nails ❤️
- A bold red outfit paired with soft pink nails is basically Valentine’s perfection. Red says “romance,” while blush pink whispers “classy.”
- Personal note: I wore this combo on Valentine’s a couple years ago, and my husband noticed my nails before the dress. That never happens.
- All-Black Outfit + Blush Pink Pop 🖤
- Black dress, black boots… then you lift your glass, and BAM—soft pink nails show up. Chic, minimal, but still festive.
- It’s like saying, “Yes, I’m mysterious, but also approachable.”
- White or Neutral Sweater + Blush Pink ☁️
- If you’re going for cozy Valentine vibes (think dinner at home or a movie night), a cream sweater + blush nails is peak softness.
- Bonus: the combo photographs beautifully for Instagram, if you’re into that.
Jewelry Pairings That Make Blush Nails Pop
Blush pink is subtle enough that jewelry choices can really change the mood.
- Gold jewelry → Warm and romantic. Blush + gold = dreamy.
- Silver jewelry → Cool, chic, modern. Perfect if you’re not into gold.
- Rose gold → Okay, this is my favorite. Rose gold against blush pink nails is like peanut butter and jelly. They just belong together.
Makeup Combos for Valentine’s Blush Nails
Yes, your makeup can totally play off your nails. Here’s what works:
- Blush-on-blush → A soft rosy blush on your cheeks + blush nails = glowy and romantic.
- Nude lips + blush nails → Clean, simple, put-together.
- Berry or red lips + blush nails → Bold but balanced. The lips take center stage, nails stay classy.
💡 Hack I use: If I don’t have time for a full face, I just pop on a cream blush that’s a shade or two deeper than my nails. Instantly looks like I actually tried.
My Valentine’s Dinner Fail (Because Balance Matters)
One year, I thought I’d be clever and match everything to my nails. Blush pink nails, blush pink dress, blush pink lipstick, blush pink earrings… yeah. Let’s just say I looked less like “romantic goddess” and more like “walking bottle of Pepto-Bismol.”
Moral of the story: match in moderation. Pick one or two elements, not the whole wardrobe.
Beyond Valentine’s: Everyday Styling
The best thing about blush pink nails? They don’t scream “holiday only.” They slide right into everyday life.
- Work setting → Blush nails look polished (pun again!) without being distracting.
- Casual weekends → Jeans + tee + soft pink nails = effortlessly chic.
- Special occasions → Add a topcoat of shimmer or rhinestones, and boom—you’re party-ready.
Creative Twists & Hacks for Blush Pink Valentine’s Nails
Okay, so blush pink nails are already gorgeous on their own. But if you’re like me, sometimes you want that little something extra—a twist that makes people go, “Ooh, cute idea!” without it looking over the top.
Over the years, I’ve played around (sometimes successfully, sometimes… not so much 😂), and I’ve collected a few fun, doable ways to upgrade blush pink nails for Valentine’s.
Hack #1: Mix Textures (Matte + Glossy)
This one’s so underrated. Instead of adding glitter or rhinestones, just switch up the finish.
- Do most nails matte blush pink.
- Add one or two glossy accent nails.
It’s subtle, but it makes your nails look way more interesting. I did this last year with matte blush on four nails and a glossy blush with a tiny heart on my ring finger. My best friend actually asked where I got them done (spoiler: it was my kitchen table).
Hack #2: Glitter, But Make It Minimal
Look, glitter can go wrong real fast. I’ve had Valentine’s nails that looked like I dipped my hands in a craft bin. Cute at age 10, not so much now.
The trick? Strategic placement.
- Tiny glitter fade from the cuticle upward (like sparkly blush champagne bubbles 🍾).
- Just one glitter accent nail (keep the others plain blush).
- Mix fine shimmer with blush pink polish for a “glow from within” vibe.
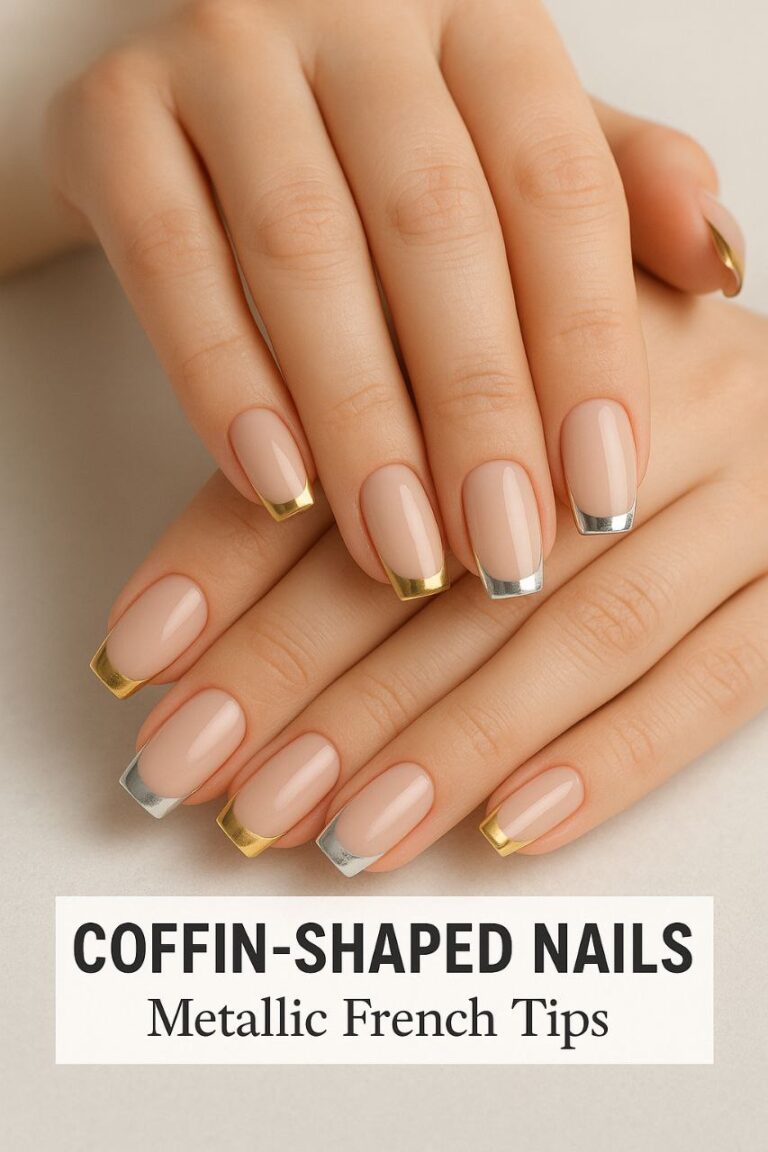
Hack #3: French Tips With a Twist
Classic French is white tips. But Valentine’s? Switch it up:
- Blush pink base + glitter tips = romantic but modern.
- Blush pink base + red tips = the ultimate Valentine combo.
- Double French → thin white line + thin blush line stacked. Chic and different.
I once tried blush pink with rose gold metallic tips, and oh my gosh—probably my favorite Valentine’s nails ever. Subtle glam, but they matched every outfit.
Hack #4: Tiny Nail Art That Doesn’t Scream “Teenager”
I’ll admit: nail art can feel intimidating (and sometimes a little cheesy). But done right, it’s adorable.
- Tiny hearts near the cuticle on one or two nails.
- Polka-dot blush pink + white combo.
- Blush pink base with gold foil flakes—looks luxe, like jewelry for your nails.
Last Valentine’s, my daughter begged me to do matching nails with her. I painted mine blush pink with one little heart accent, and hers were full-on rainbow glitter. Guess whose got more compliments at dinner? 😂
Hack #5: Ombre Blush Fade
This one’s salon-level, but you can DIY with a sponge if you’re patient. Start with a soft blush near the cuticle and fade into either:
- White → dreamy and bridal.
- Deeper pink → romantic and bold.
- Nude → subtle and wearable.
When it works, it looks airbrushed. When it doesn’t… well, let’s just say I’ve walked around with nails that looked like strawberry milk explosions. Practice is key.
Hack #6: Stickers & Press-Ons (Zero Shame)
Listen, I’m a mom. Sometimes life doesn’t leave time for nail art. That’s where stickers and press-ons save the day.
- Tiny metallic stickers (stars, hearts, dots).
- High-quality blush pink press-ons that already have art built in.
- Bonus: press-ons are easy to swap if you mess up before date night. (Been there.)
Fun fact: Two years ago, I glued on blush press-ons in my car outside a restaurant because my polish chipped last minute. Classy? Maybe not. Effective? Totally.
Hack #7: Layer Your Top Coats for Custom Looks
This is my lazy-girl trick. Instead of buying five different polishes:
- Add a holographic top coat for sparkle.
- Use a matte top coat for modern vibes.
- Layer a sheer shimmer coat over blush pink for Valentine glow.
It’s like having three manis in one bottle.
My “Oops” Hack That Actually Worked
One time, I spilled a tiny drop of red polish on my freshly done blush nails (because my toddler decided to “help”). I was this close to taking it all off when I thought, “Wait… what if I just add more red dots?”
Boom. Instant Valentine’s polka-dot nails. Not planned, but people at school pickup thought I had them done on purpose. Sometimes the accidents are the best looks.
Valentine’s Day Blush Pink Nails FAQ
Here are some quick answers to the questions women ask most when they’re thinking about Valentine’s Day nails.
❓ How long before Valentine’s should I get my nails done?
Ideally 2–3 days before. This way, they’re still fresh and glossy, but you’re not stressing about chips on the actual day.
❓ Is blush pink flattering on every skin tone?
Yes! That’s one of the reasons it’s so popular.
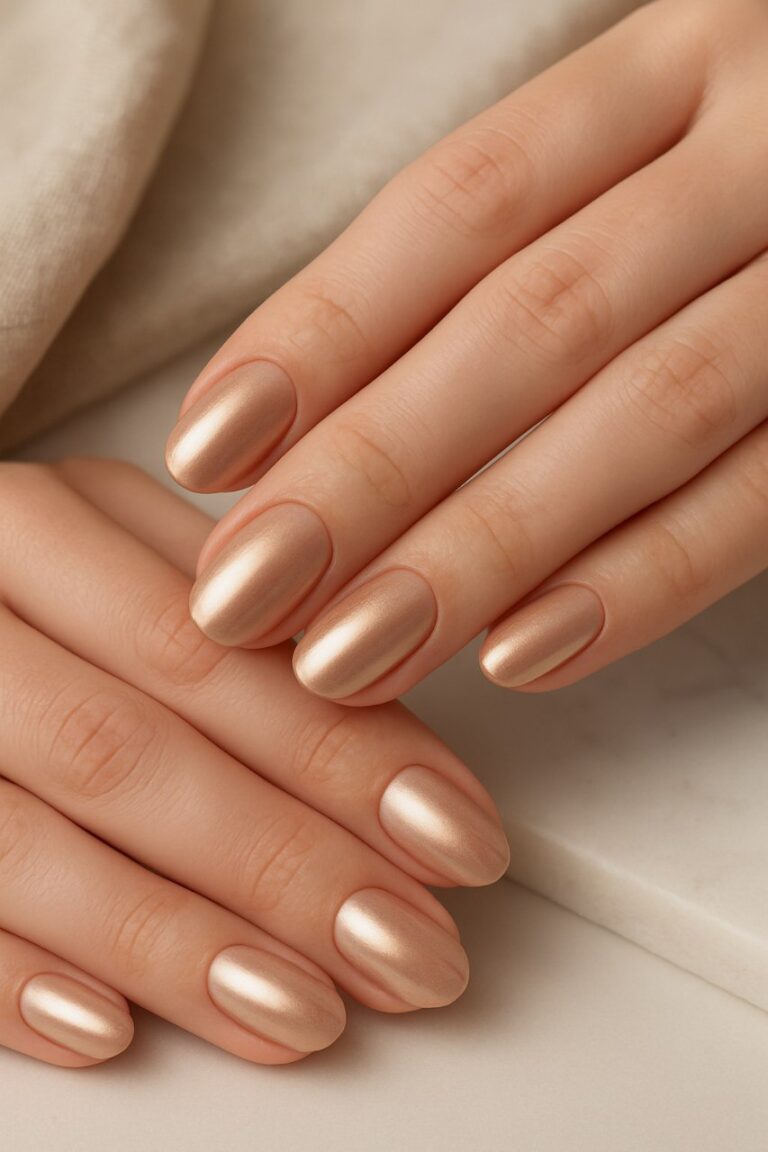
- Fair skin → soft, milky blush looks dreamy.
- Medium/tan skin → peachy blush pops beautifully.
- Deep skin tones → rich, rose blush shades look stunning and vibrant.
❓ What if I can’t get to a salon—can I DIY?
Absolutely. In fact, most of the hacks we shared work at home: press-ons, ombré sponges, nail stickers, or even layering top coats. Just give yourself extra drying time.
❓ Can blush pink nails look too “simple” for Valentine’s?
Not if you style them right! Add glitter fades, metallic tips, or even just a glossy vs. matte mix, and suddenly they feel intentional and chic.
❓ How do I make my blush pink nails last longer?
- Apply a base coat to protect against staining.
- Seal with two thin layers of top coat (instead of one thick coat).
- Reapply top coat every 2–3 days.
- Keep cuticles moisturized with oil (prevents peeling).
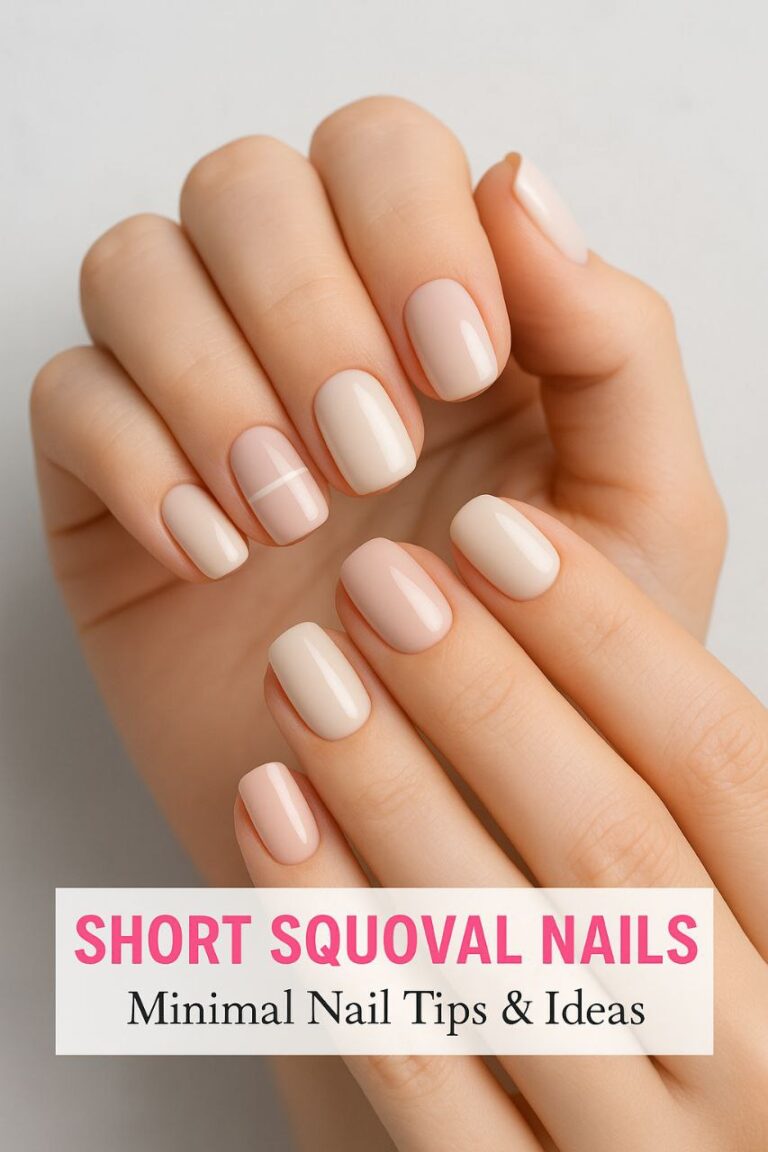
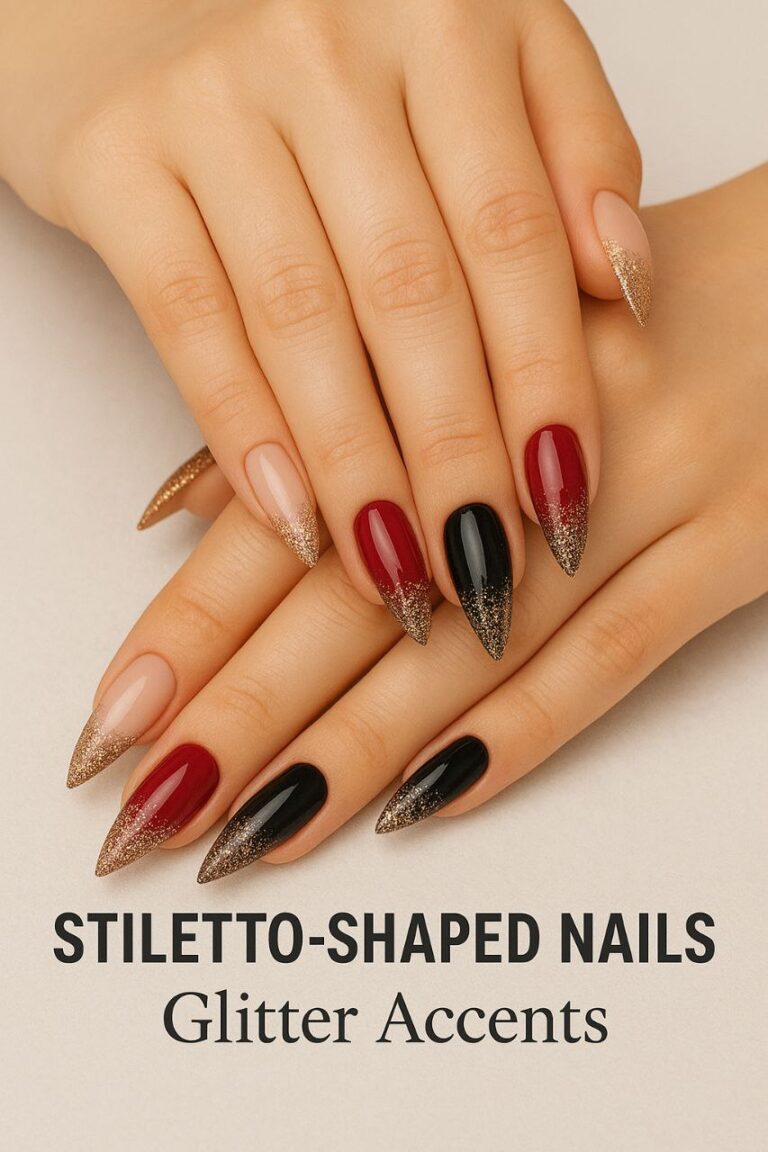
❓ What nail shape works best with blush pink?
- Almond or oval → romantic, soft, and elegant.
- Square or squoval → clean and modern.
- Coffin or stiletto → dramatic if you want to make a statement.
Blush pink adapts beautifully to all shapes.
Final Thoughts
Valentine’s Day is about celebrating love—but it’s also a perfect excuse to spoil yourself a little. Blush pink nails aren’t just “pretty”—they’re versatile, timeless, and endlessly customizable. Whether you want them soft and romantic, fun and playful, or glamorous and bold, blush pink is the ultimate canvas.
I’ve always believed nails are like jewelry: they don’t just complete an outfit, they set the mood. When I look down at a set of glossy blush nails on Valentine’s, I instantly feel a little more feminine, a little more confident, and honestly… a little more excited for date night (or even a cozy girls’ night in 💕).
So this year, give blush pink nails a try. Mix textures, experiment with accents, and make them yours. Who knows—you might just find your new signature Valentine’s look.
💖 Here’s to love, self-care, and nails that sparkle just as much as you do!

Olivia Bennett
Hi, I’m Olivia Bennett, the creator of Styleandbeauty101. I started this blog to share my love for beauty, haircare, and skincare with women across the worldwide.
Here, I share practical routines, product reviews, tutorials, and trend insights designed to make beauty feel simple and fun. My goal is to help you discover what works best for your lifestyle so you can feel confident every single day.
Beyond blogging, I love experimenting with DIY beauty recipes, learning about cultural beauty rituals, and connecting with my amazing readers on social media.